
Getting Started with Artemis
In order to use Artemis, you must request an allocation and you must be connected to a USC network directly or via a VPN. See the Connecting to a USC VPN guide for detailed instructions.
Note: Artemis is not intended for large-scale parallel computing or data processing. The main goal of Artemis is to provide resources for small- to medium-sized workloads.
Requesting an allocation
Users need to submit an allocation request through the User Portal before gaining access to Artemis cloud services. Instructions for requesting an allocation can be found in our Request New Allocation user guide.
Once approved, users are granted 200 GB of storage, which is cumulative across all the VMs they create. Additionally, each Principle Investigator's (PI) group is granted 13 IP addresses, allowing them to run 13 VM's at once without detaching the VMs' network device.
Artemis will alert users with an error message and fail to create their VM if their requested storage amount exceeds the user's quota.
Logging in to Artemis
First, enter your USC NetID and password to authenticate via Shibboleth and Duo two-factor authentication. After entering your USC credentials, you should see the Artemis login form.
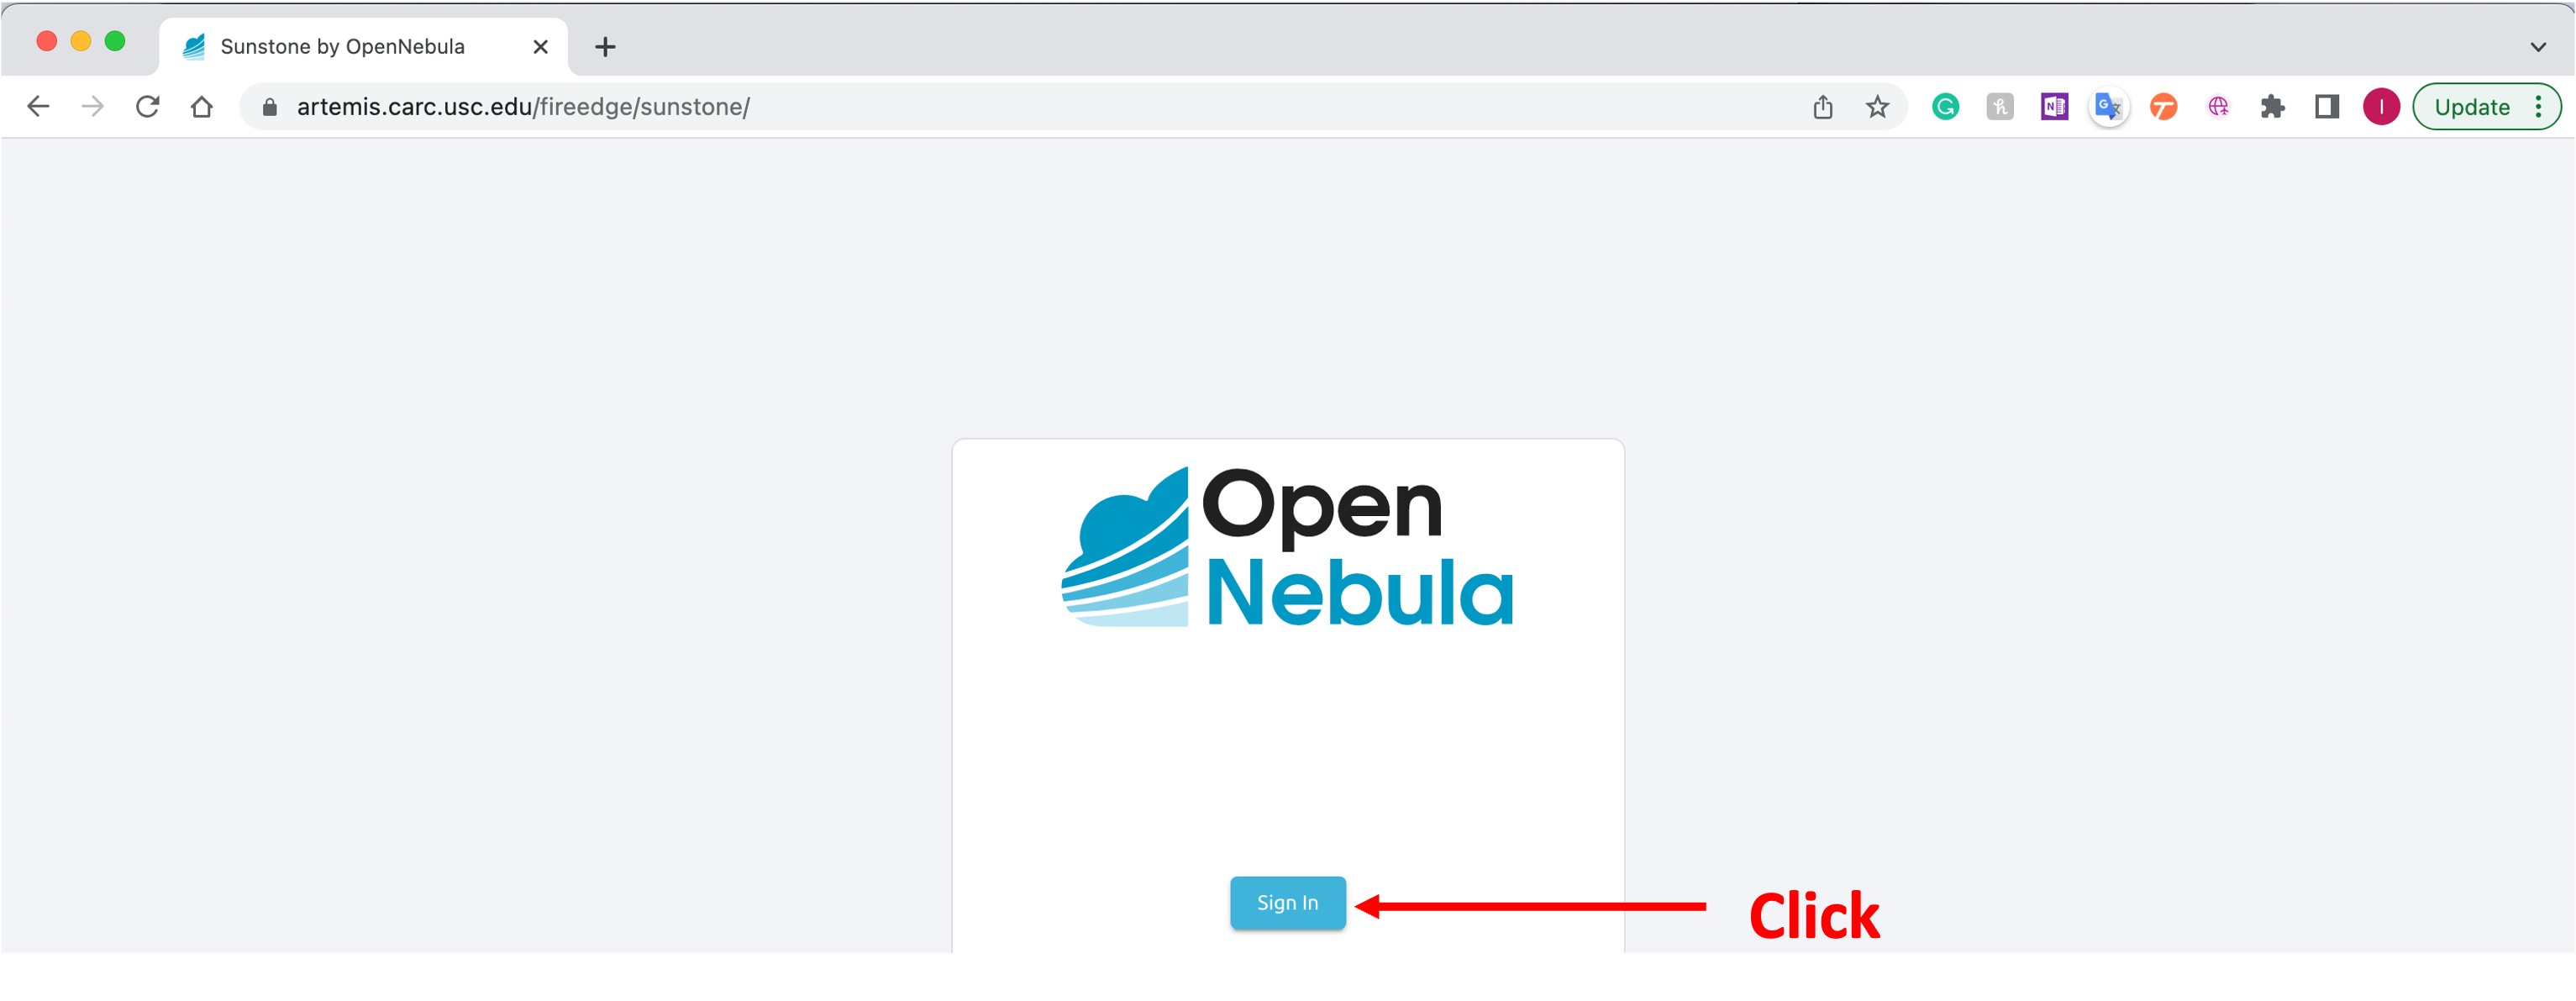
Select the Sign in button. If you receive an error, then your USC account has not been given access—please submit a help ticket to contact us about gaining access.
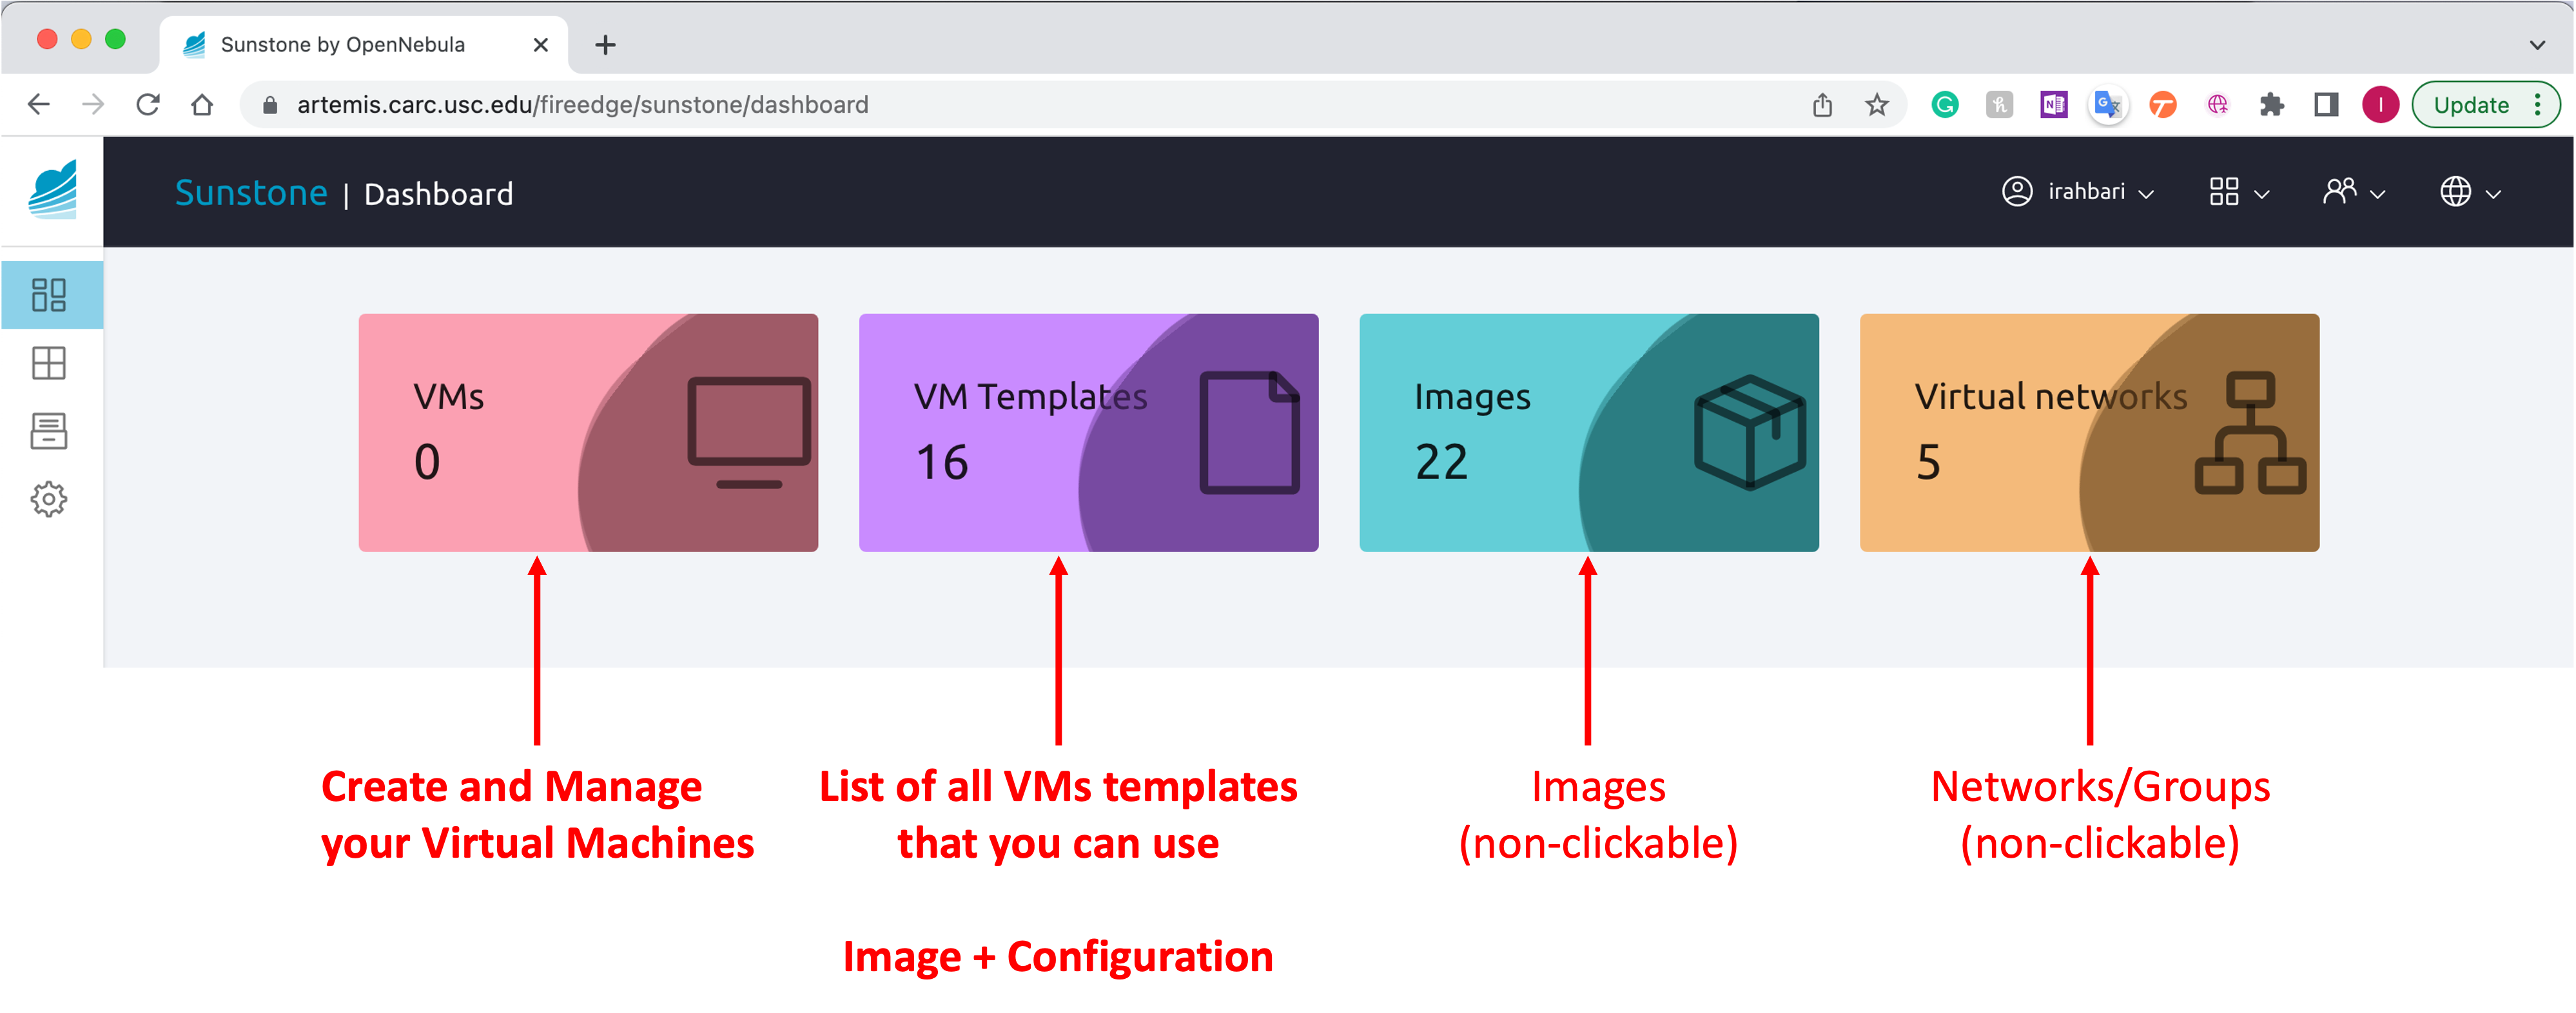
Dashboard
Upon logging in, the dashboard appears on the screen. From this page, users can create and configure VMs, as well as check the status of their existing VMs. Users can also inspect the VM templates they have access to, the images available, and their networks.
Creating a VM
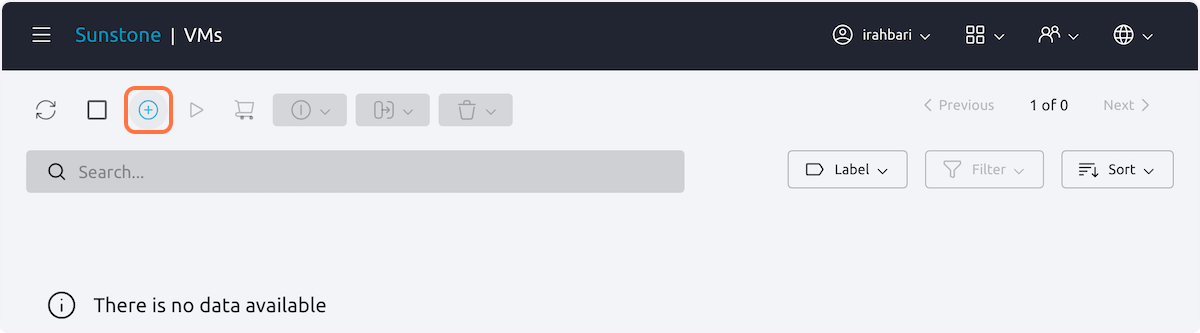
From the Artemis dashboard, select the VMs box to create a new VM. On the next page, select the Create button at the top.
Two pages of available VM templates display on the following page. Select the template you wish to create. Once selected, enter a name for the VM. If you would like to create more than one identical VM, enter in the number you would like to create to the right in the Number of instances field.
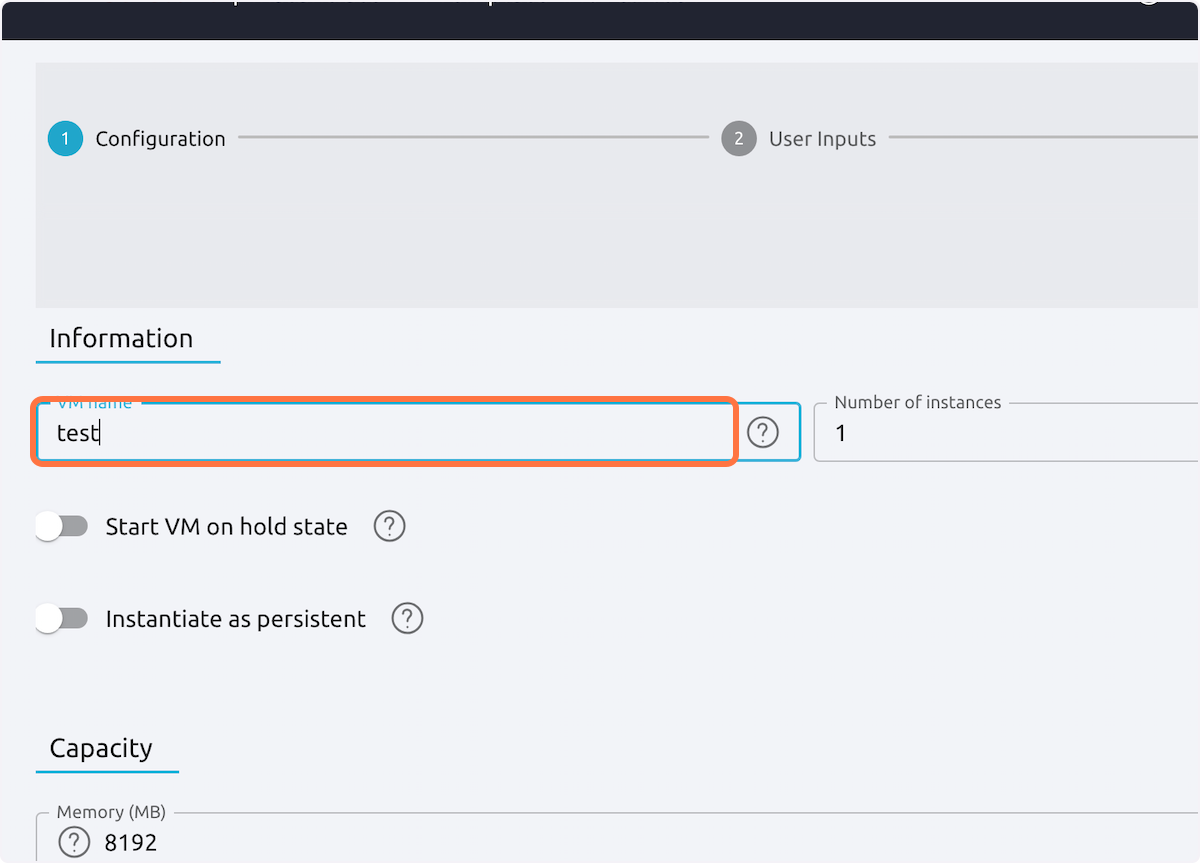
Specify the amount of memory (in MB) and the numver pf virtual CPUs needed from each drop-down menu. Specify the number of physical CPUs by adjusting the blue slider. Values only range from 0-1.
Note: Physical CPUs should never be set to 0.
Select next and then enter in the PROJECT_GROUP to grant your entire group acces to the VM.
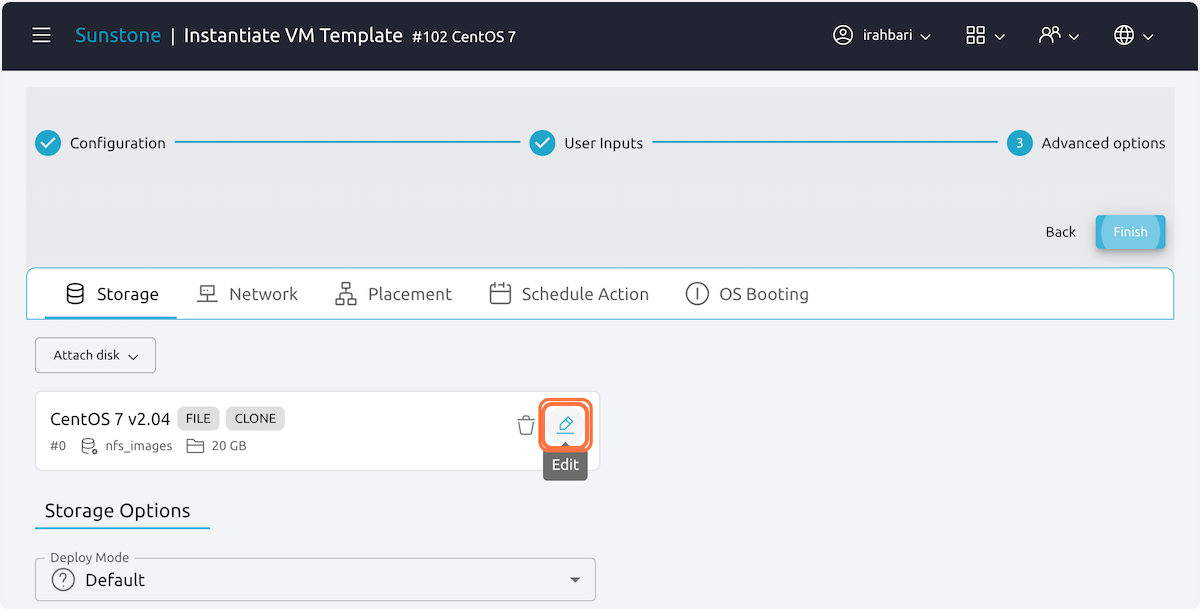
Optionally, aspects of the VM can be modified before launch by slecting teh Edit button. If no modifications are needed, select Finish to launch.
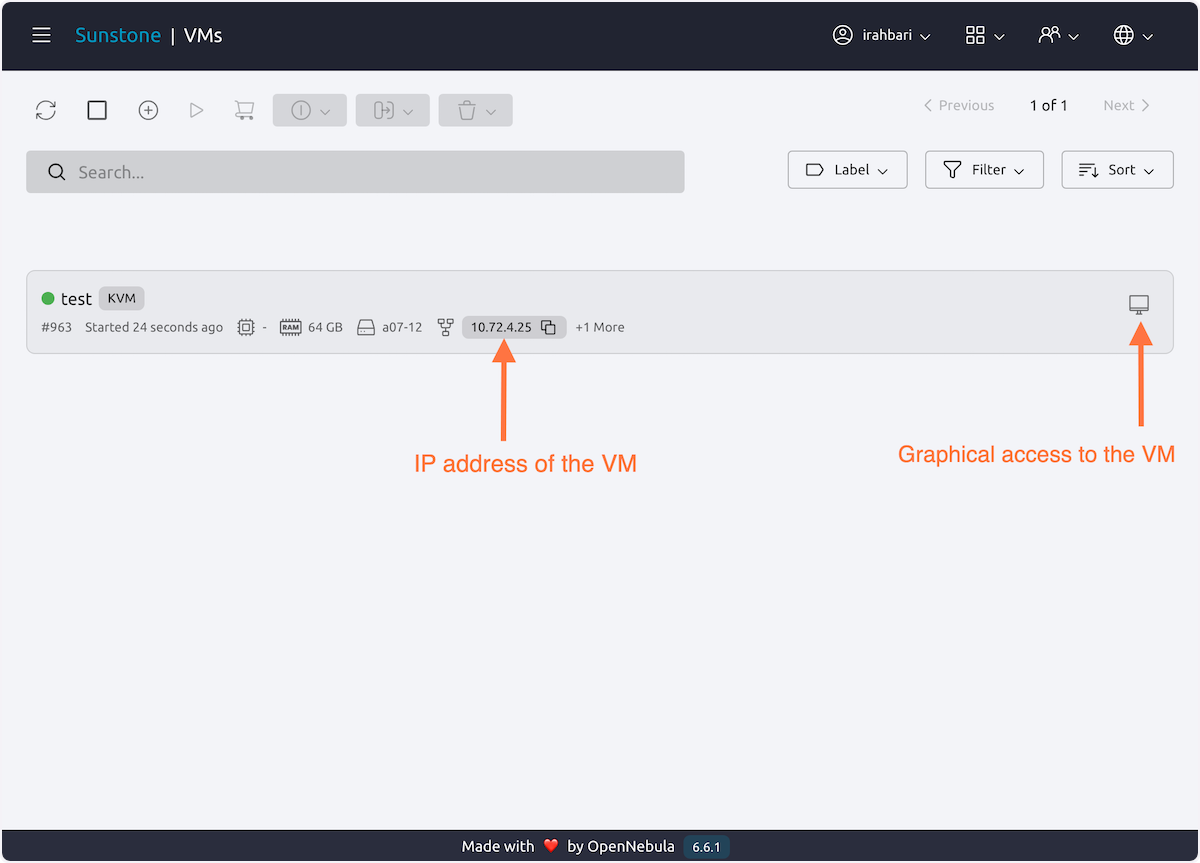
The newly created VM now appears in your list of active VMs. The circle to the left of the VM's name displays it's status:
- Blue - configuring
- Green - ready
Once the VM is ready, the IP address and graphical access icon appear.
Group and individual quotas
The table below shows the different VM templates available on Artemis, as well as the default and maximum values for their computing resources.
Note: FireCracker VMs do not allow you to modify the memory, vCPU, and storage after creation.
| Name | Hypervisor | Memory (GB) | Max Memory (GB) | Virtual CPU | Max VCPU | Physical CPU | Storage (GB) |
|---|---|---|---|---|---|---|---|
| Amazon Linux | KVM | 4 | 128 | 4 | 64 | 2 | 25 |
| Ansys 2022 | KVM | 16 | 128 | 16 | 128 | 8 | 110 |
| Apache Web Server | FireCracker | 2 | 128 | 2 | 64 | 1 | 5 |
| CentOS 7 | KVM | 8 | 128 | 8 | 64 | 4 | 20 |
| Jupyter Notebook | KVM | 8 | 128 | 8 | 64 | 4 | 20 |
| MongoDB | FireCracker | 4 | 128 | 4 | 64 | 2 | 10 |
| MySQL Server | FireCracker | 4 | 128 | 4 | 64 | 2 | 5 |
| NGINX Web Server | FireCracker | 2 | 128 | 2 | 64 | 1 | 10 |
| Redis Server | FireCracker | 4 | 128 | 4 | 64 | 2 | 5 |
| RStudio | KVM | 8 | 128 | 8 | 64 | 4 | 20 |
| SingularityCE | KVM | 8 | 128 | 8 | 64 | 4 | 20 |
| Ubuntu 22.04 | KVM | 8 | 128 | 8 | 64 | 4 | 20 |
| Ubuntu 20.04 | KVM | 8 | 128 | 8 | 64 | 4 | 20 |
| Windows Server 2019 | KVM | 16 | 128 | 16 | 128 | 8 | 60 |