Storage Management on Artemis
Storage overview
Virtual Machines (VMs) have access to two types of storage:
- Allocated disk space on the VM itself
- Access to CARC storage allocations via the mounted /home and /project file systems.
Note: The home and project file systems are not available on Windows VMs.
Local storage
Artemis has a 200TB dedicated SSD-backed network file system with 100Gbps bandwidth. Each user has 200GB of the storage quota that can be distributed across their VM images and local scratch space. In a Windows VM, this makes up the *C:* partition, and in Linux VMs, it includes the root and a fast local scratch mounted automatically as /scratchlocal.
Data stored here is not automatically backed up. Use the snapshot feature to manually back up data. For more information on how to create a snapshot, see our Virtual Machine Management user guide. Snapshots are stored locally on the Artemis system and saved for two weeks.
CARC storage allocation
Virtual machines deployed in the private cloud have access to the mounted /home1, /scratch2, and /project file systems. They are mounted automatically at /home1/<username>, /scratch1/<username>, /scratch2/<username>, and /project/<projectname>, respectively. Data saved to the home or project file systems is backed up every day.
Note: Windows Server VMs are an exception and do not have access to mounted file systems—users will need to transfer their data just as they would to and from their local computer.
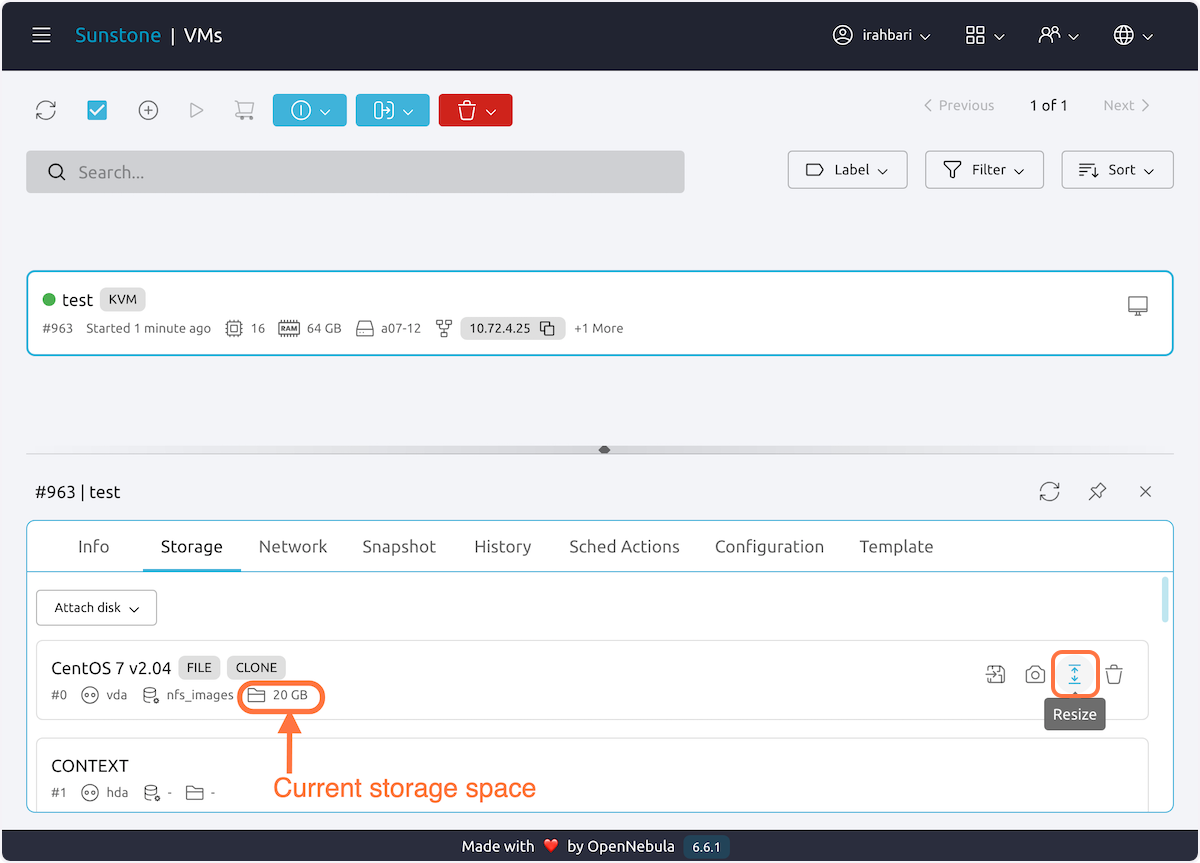
Modifying the size of local storage
The amount of local storage for Linux and Windows VMs can be increased after creation. This is simply done from the Artemis dashboard, by selecting the VM, moving to the Storage tab, and selecting the resize button.
Enter the new amount of storage (in MB) and accept the changes.
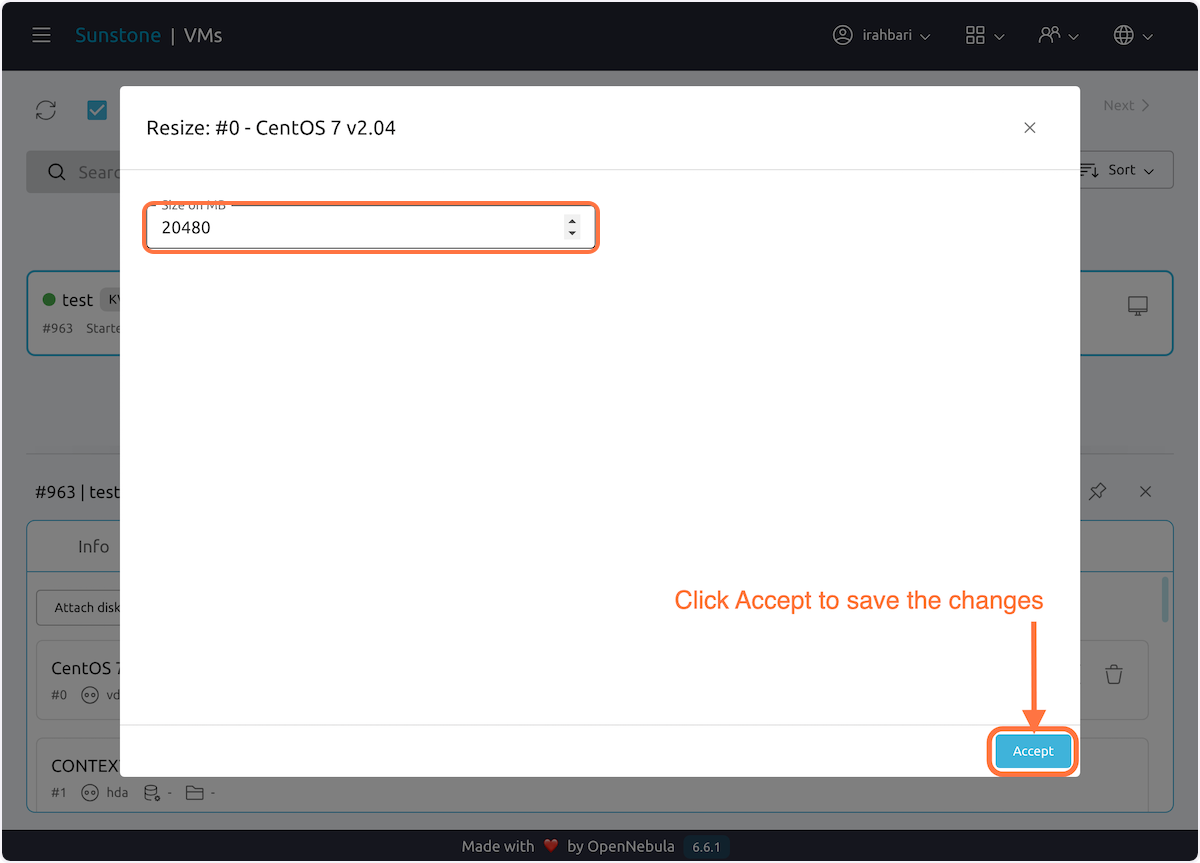
Note: storage size can only be increased, not decreased.
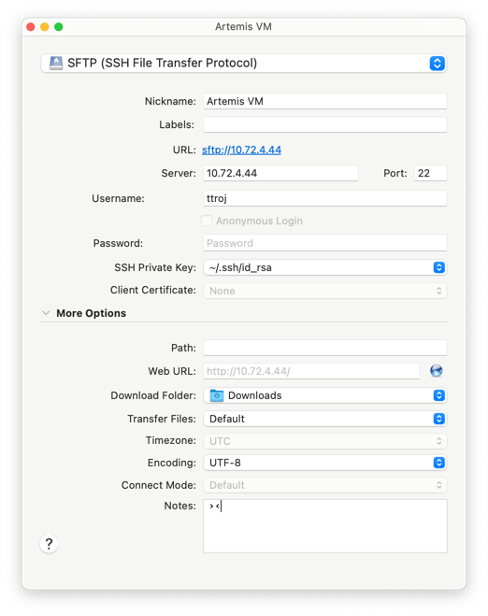
Transferring data
Data transfers can be done either through the command line or using a graphical user interface (GUI). The user guide for command line transfers can be found here and the guide for GUI transfers is here.
Data transfers while using a VM are performed the same way as they are with other CARC sytems, with one key difference. Enter in the VM's IP address instead of "hpc-transfer1.usc.edu" or "discovery.usc.edu" in the Server field.