Virtual Machine Management
See Getting Started with Artemis for instructions on creating your first VM.
VM status and details
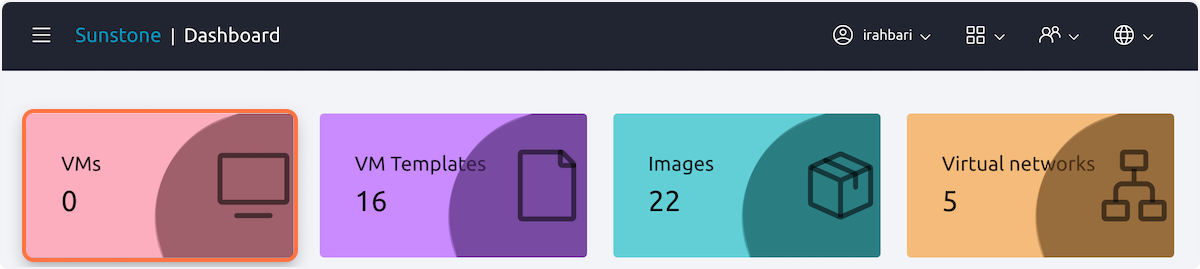
The dashboard displays basic information about a user's Artemis utilization. The VMs box lists all the VMs created by the user.
Select an active VM to expand details about it in several tabs.
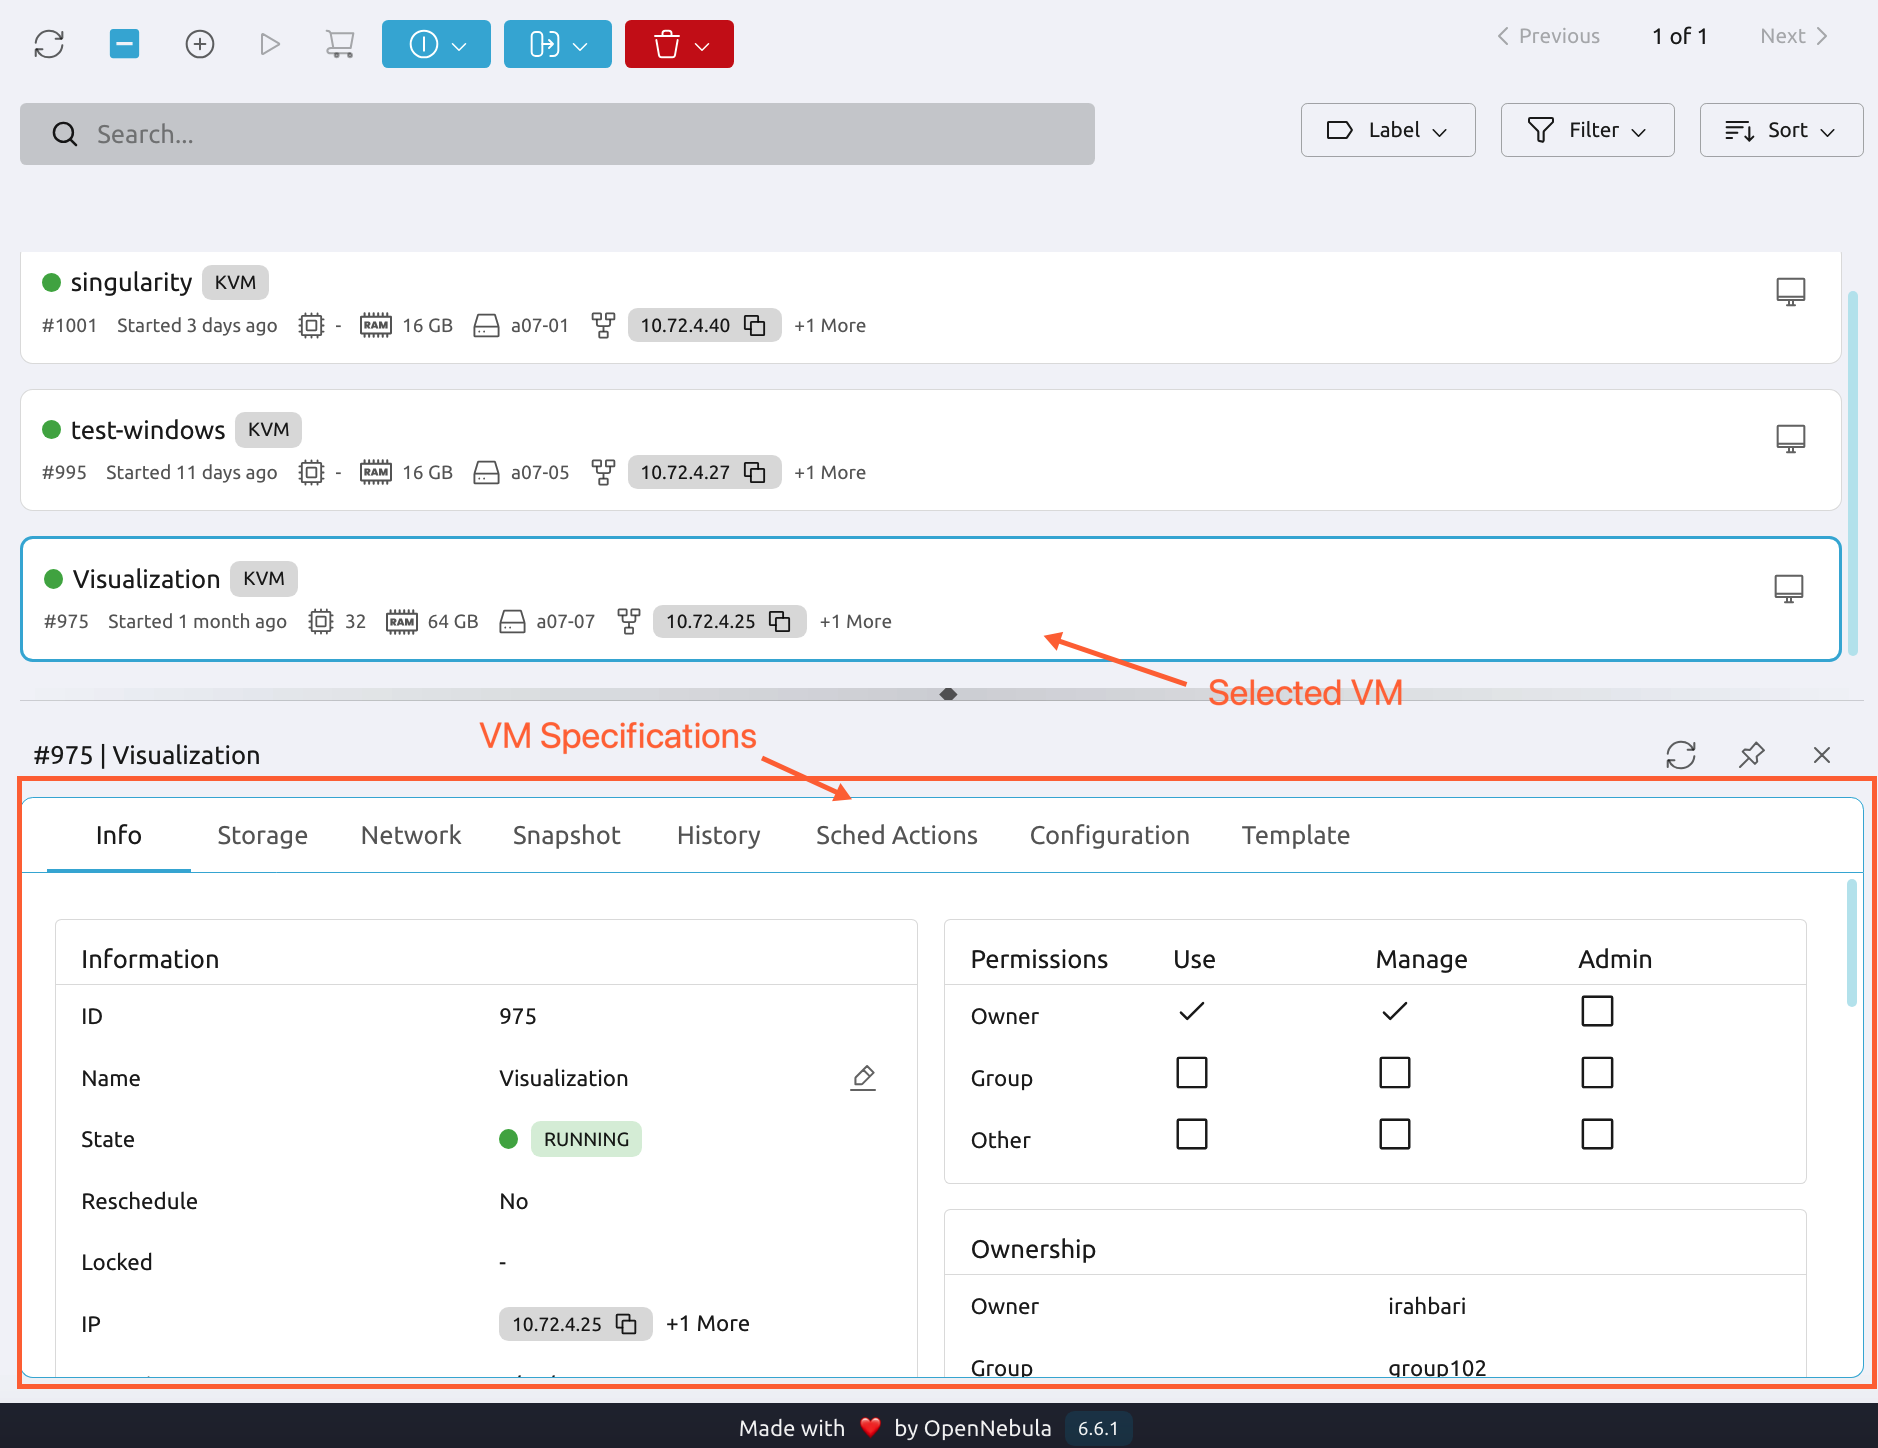
- Info: Basic information about the VM, such as VM name (which can be edited), IP address and start time, permissions, and ownership.
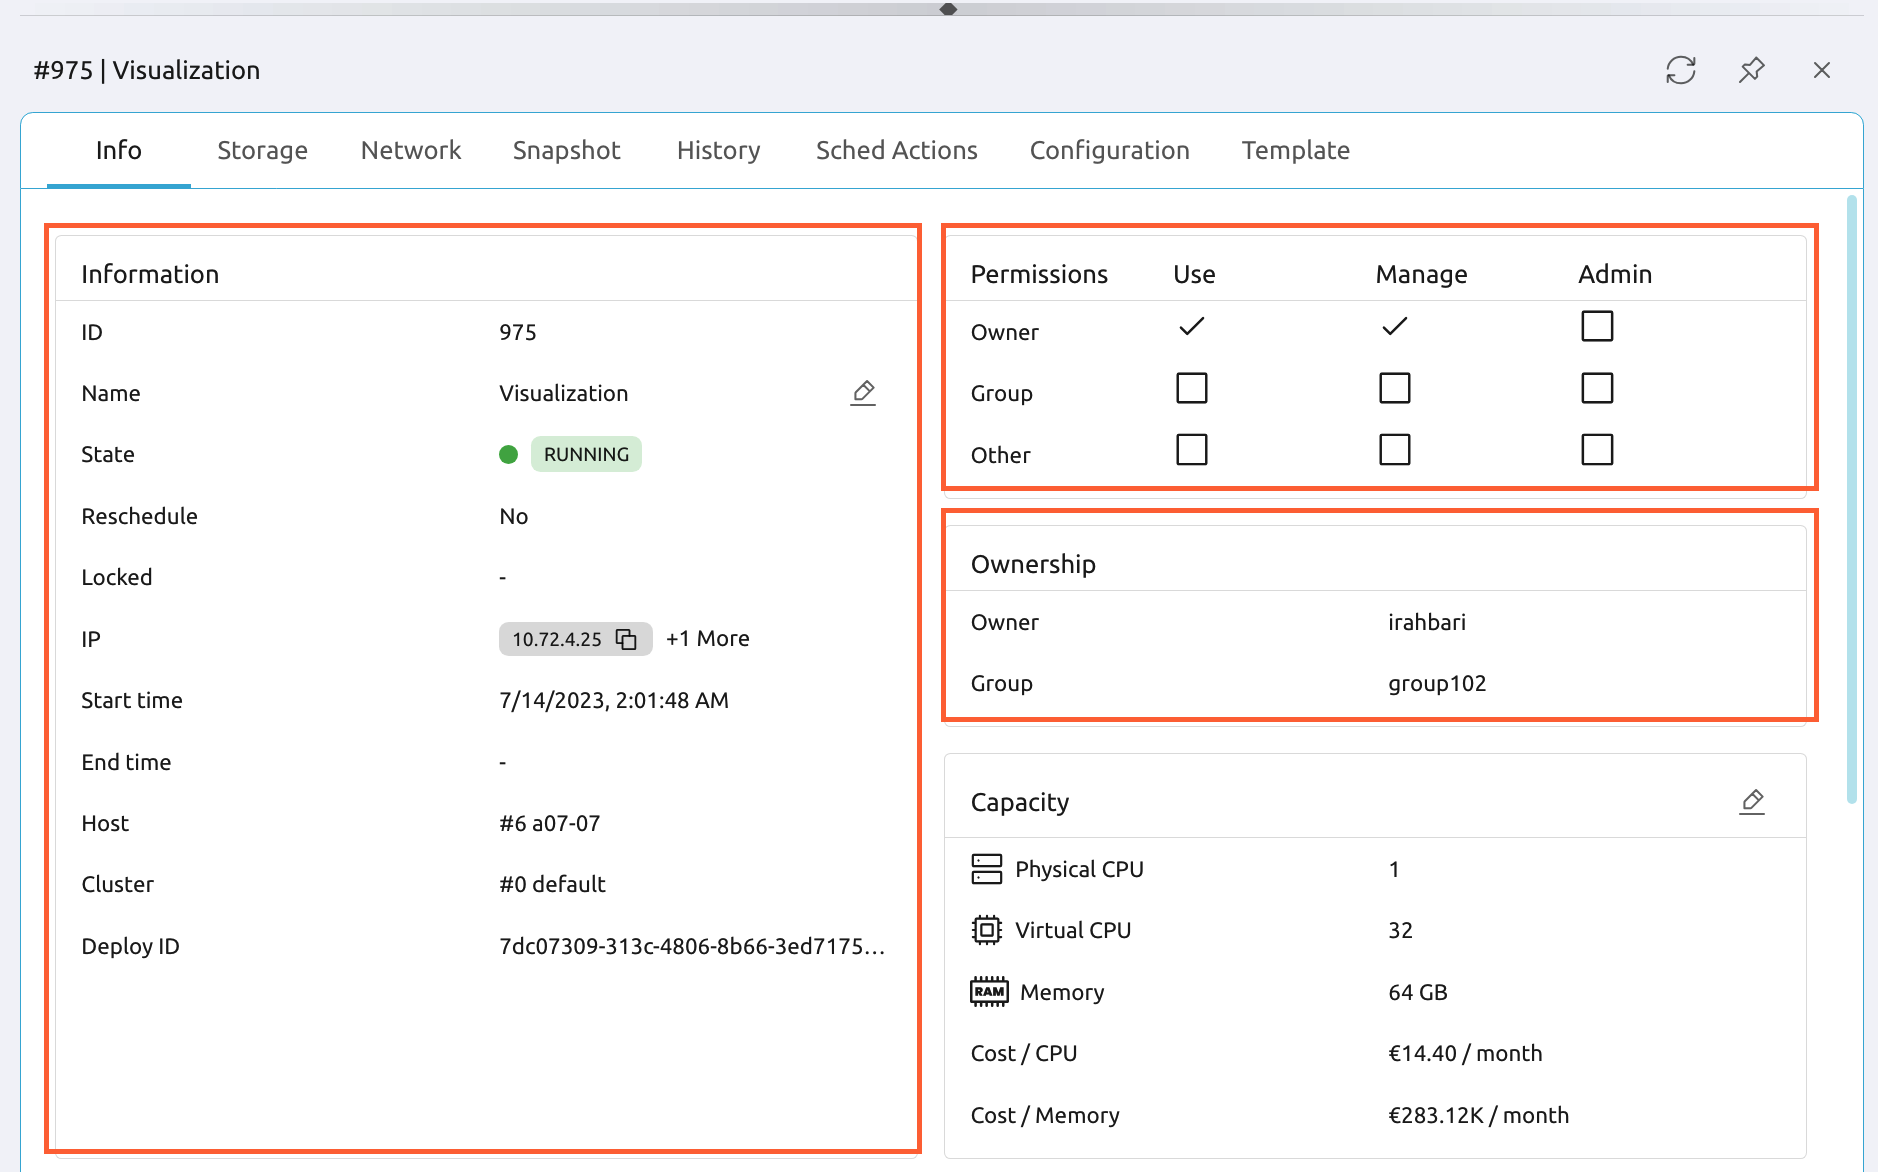
The capacity section displays the physical and virtual CPUs, and memory. These fields can be modified.
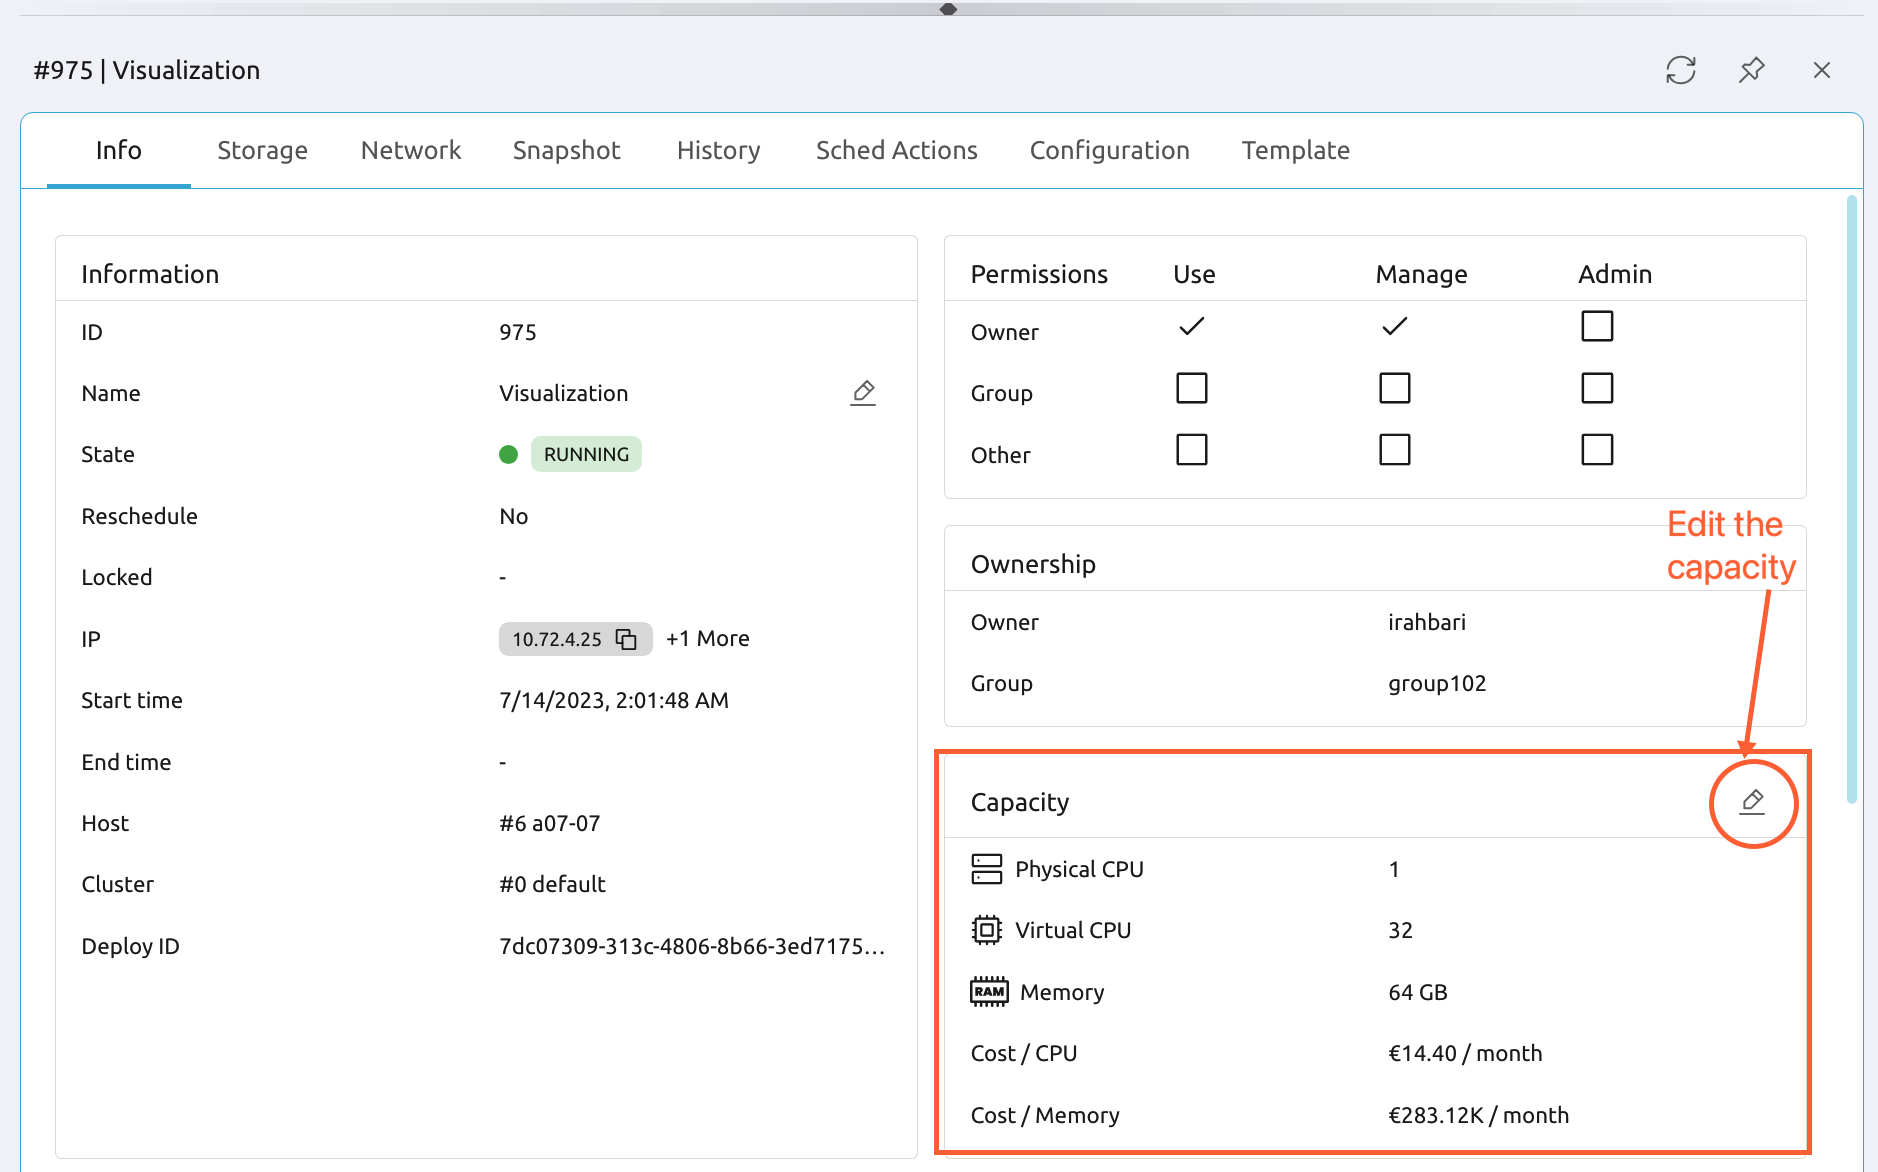
Physical CPUs can only be a value between 0 and 1. Physical CPUs should never be set to 0.
Virtual CPUs refer to the number of cores used for the VM. The multiplication of physical and virtual CPUs provides the total number of CPUs that are used to run and support the VM.
Note: The CPU and memory costs are for reference only. PIs will not be charged for their Artemis usage until further notice.
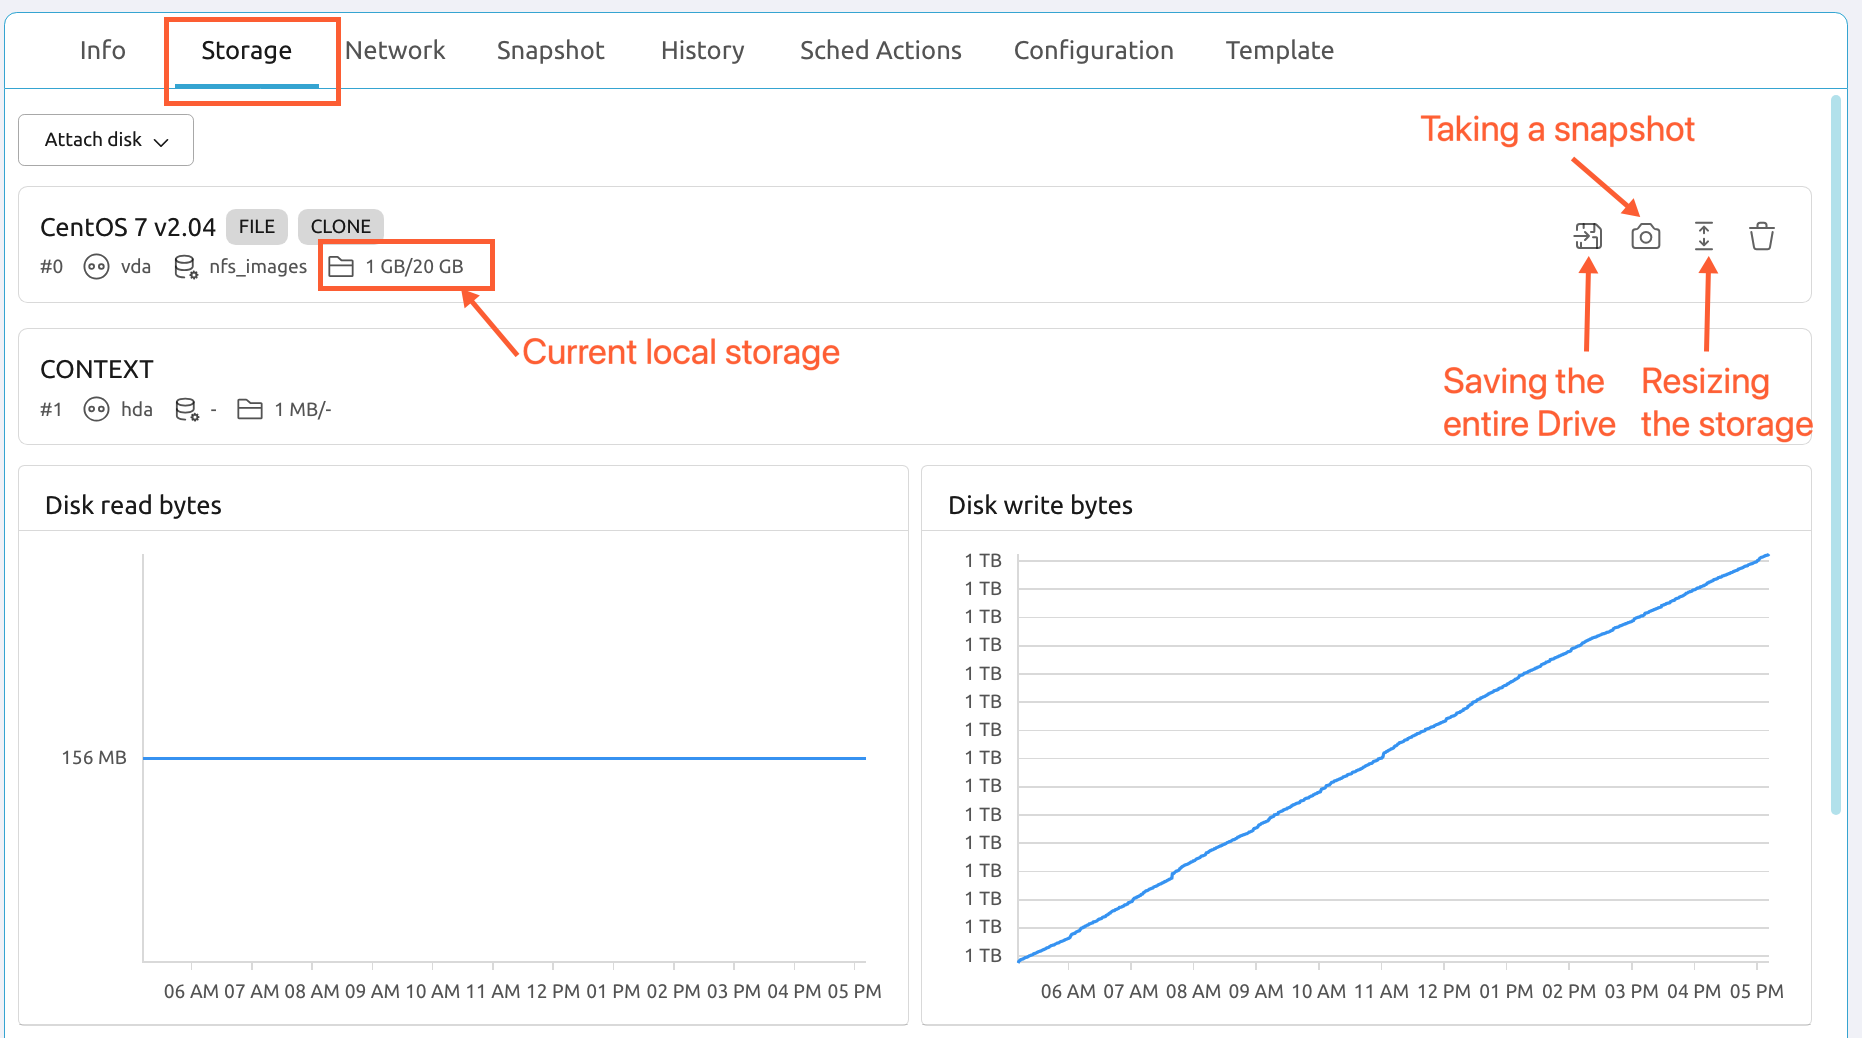
- Storage: Information regarding local storage, with the option to resize. Users can also make a copy of storage content and create disk snapshots from this tab.
Network: Information about the network connection.
Snapshot: Take a whole system snapshot here. As opposed to the disk snapshot in the Storage tab, the system snapshot saves the entire VM state, including the storage and memory.
It is recommended to use the Storage tab instead.
History: All actions taken by the user are recorded in this tab.
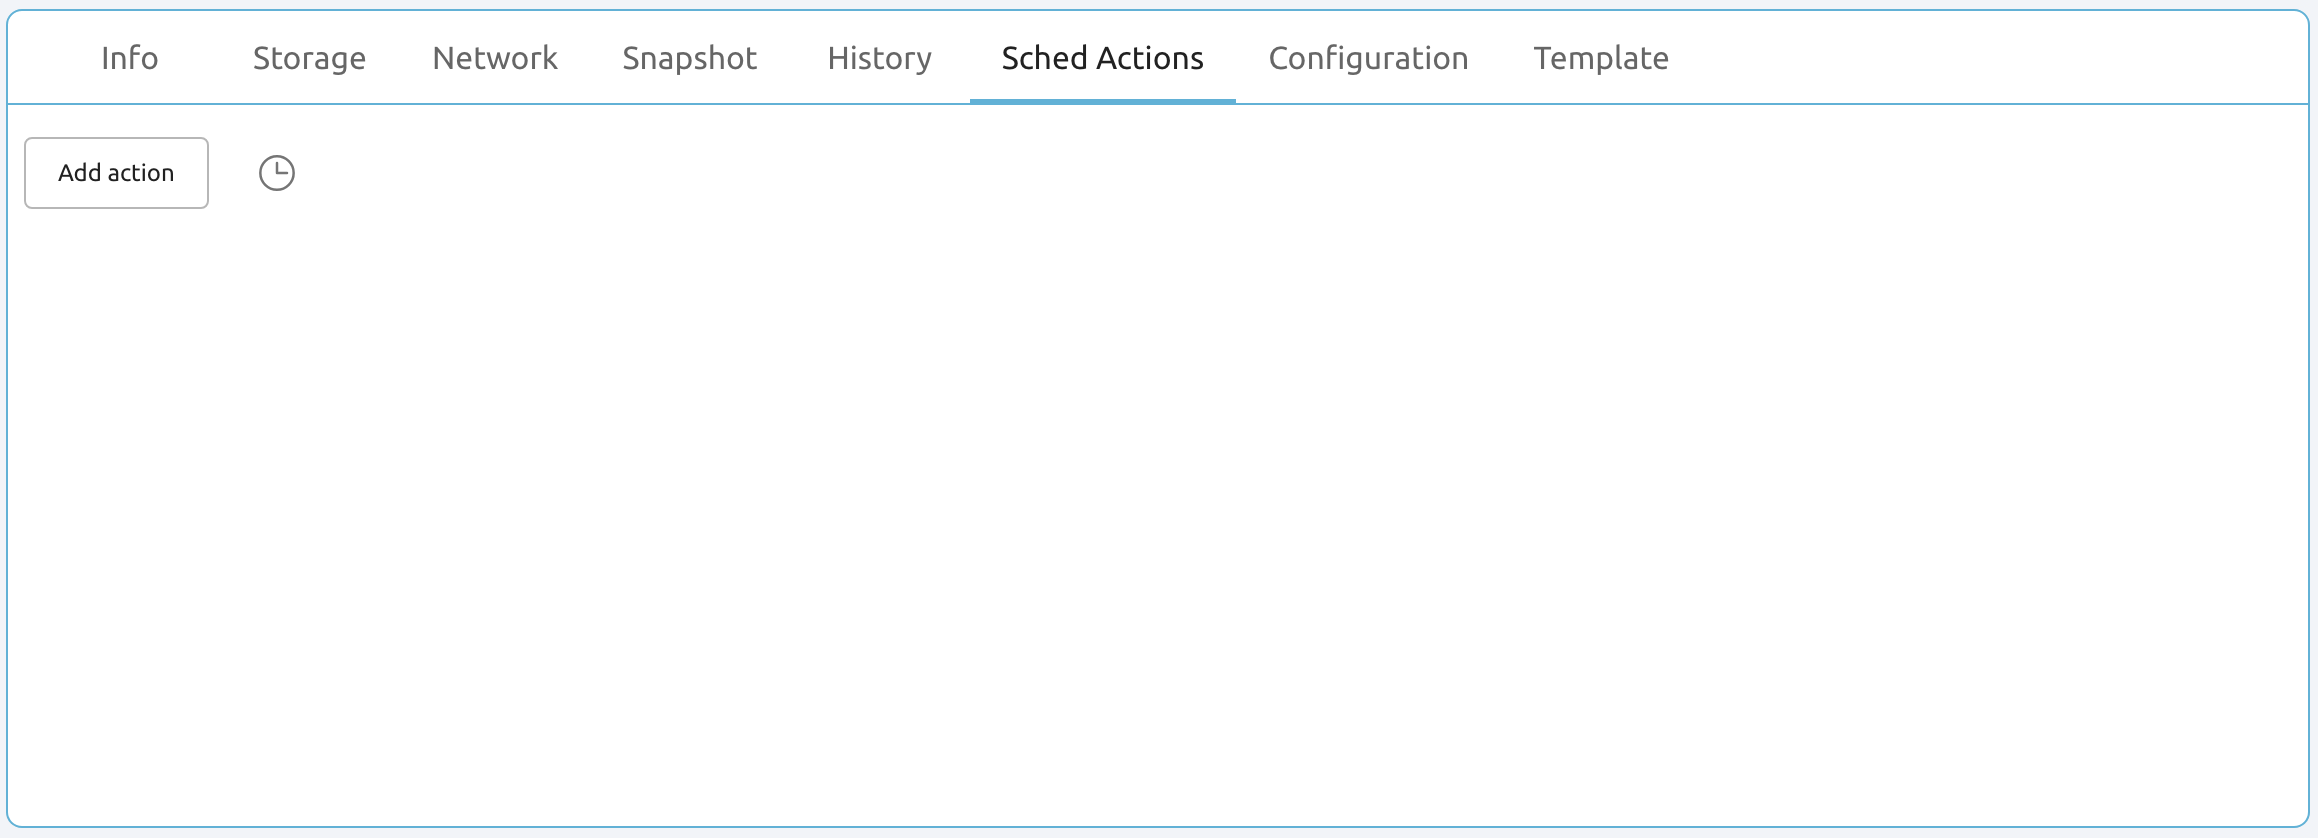
Sched Actions: This tab allows users to schedule certain tasks, such as termination, suspension, and taking snapshots.
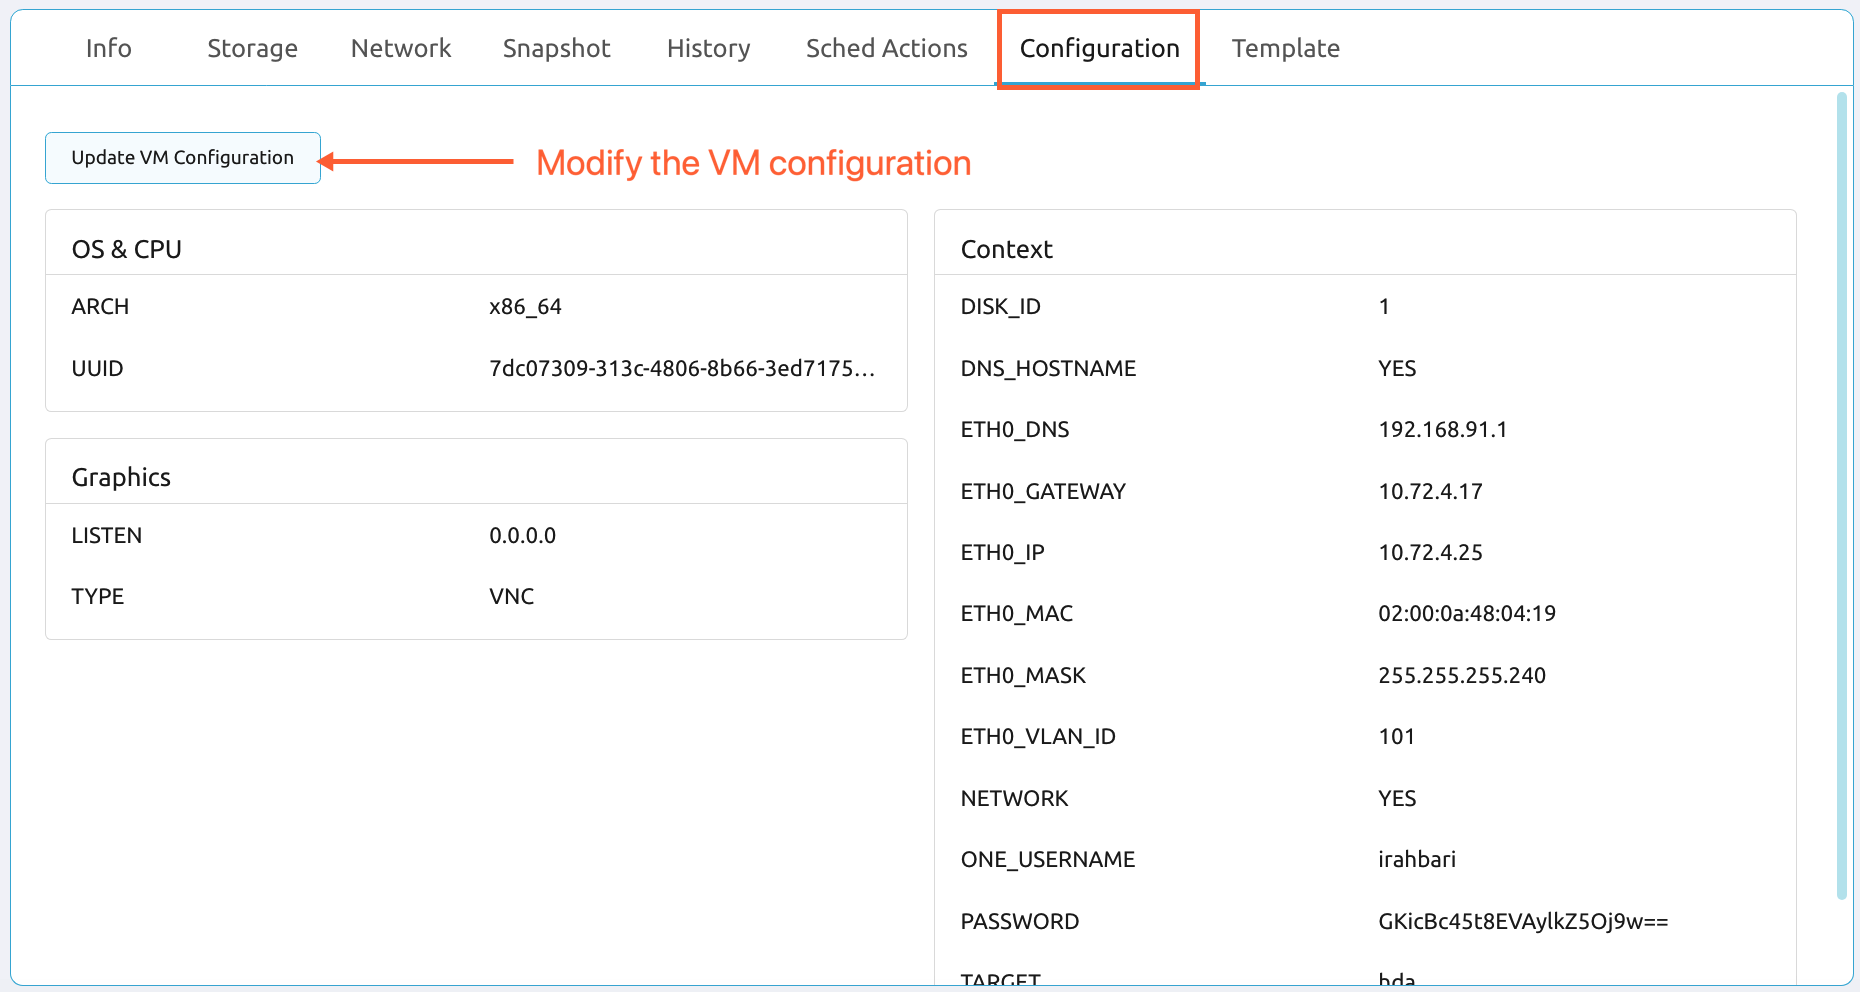
Configuration: Details about the VM configuration. Select Update VM Configuration to access the advanced configuration settings, such as limiting the IP addresses that can access the VM and adding SSH public keys.
- Template: Details about the VM template used to deploy this VM.
Modifying a VM
After creation, several aspects of VMs can be modified, such as changing capacity, storage, and network.
Capacity can be edited in the Info tab. Storage can be edited in the Storage tab.
Snapshots
Snapshots are used as a backup method to restore VMs back to an earlier version. A good practice is to take a snapshot of your VM whenever you've completed a phase of your work. If you make a mistake later, the snapshot allows you to restore the VM to a previous checkpoint.
Taking a snapshot
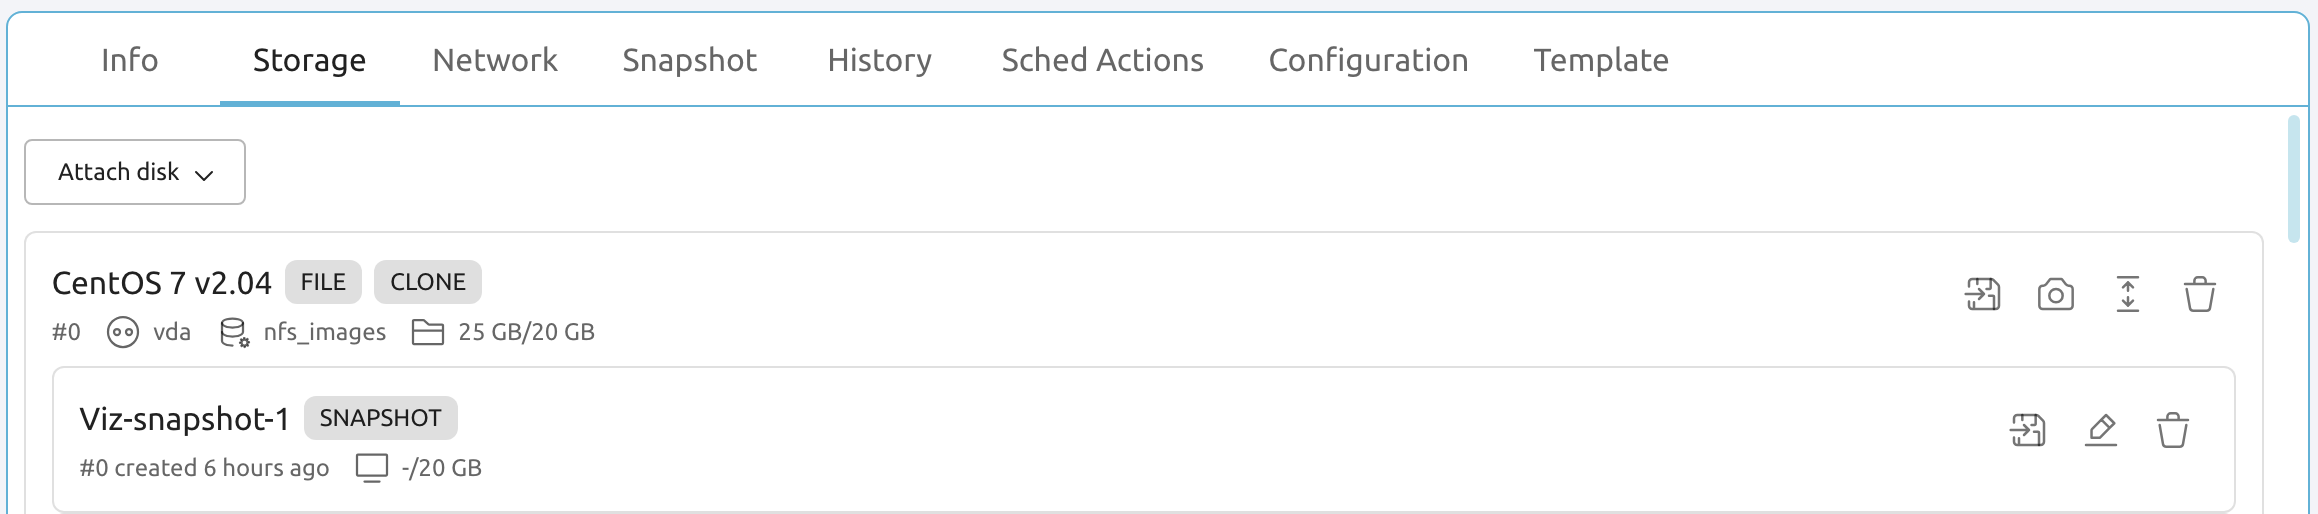
Take a snapshot from the Storage tab in VM details.
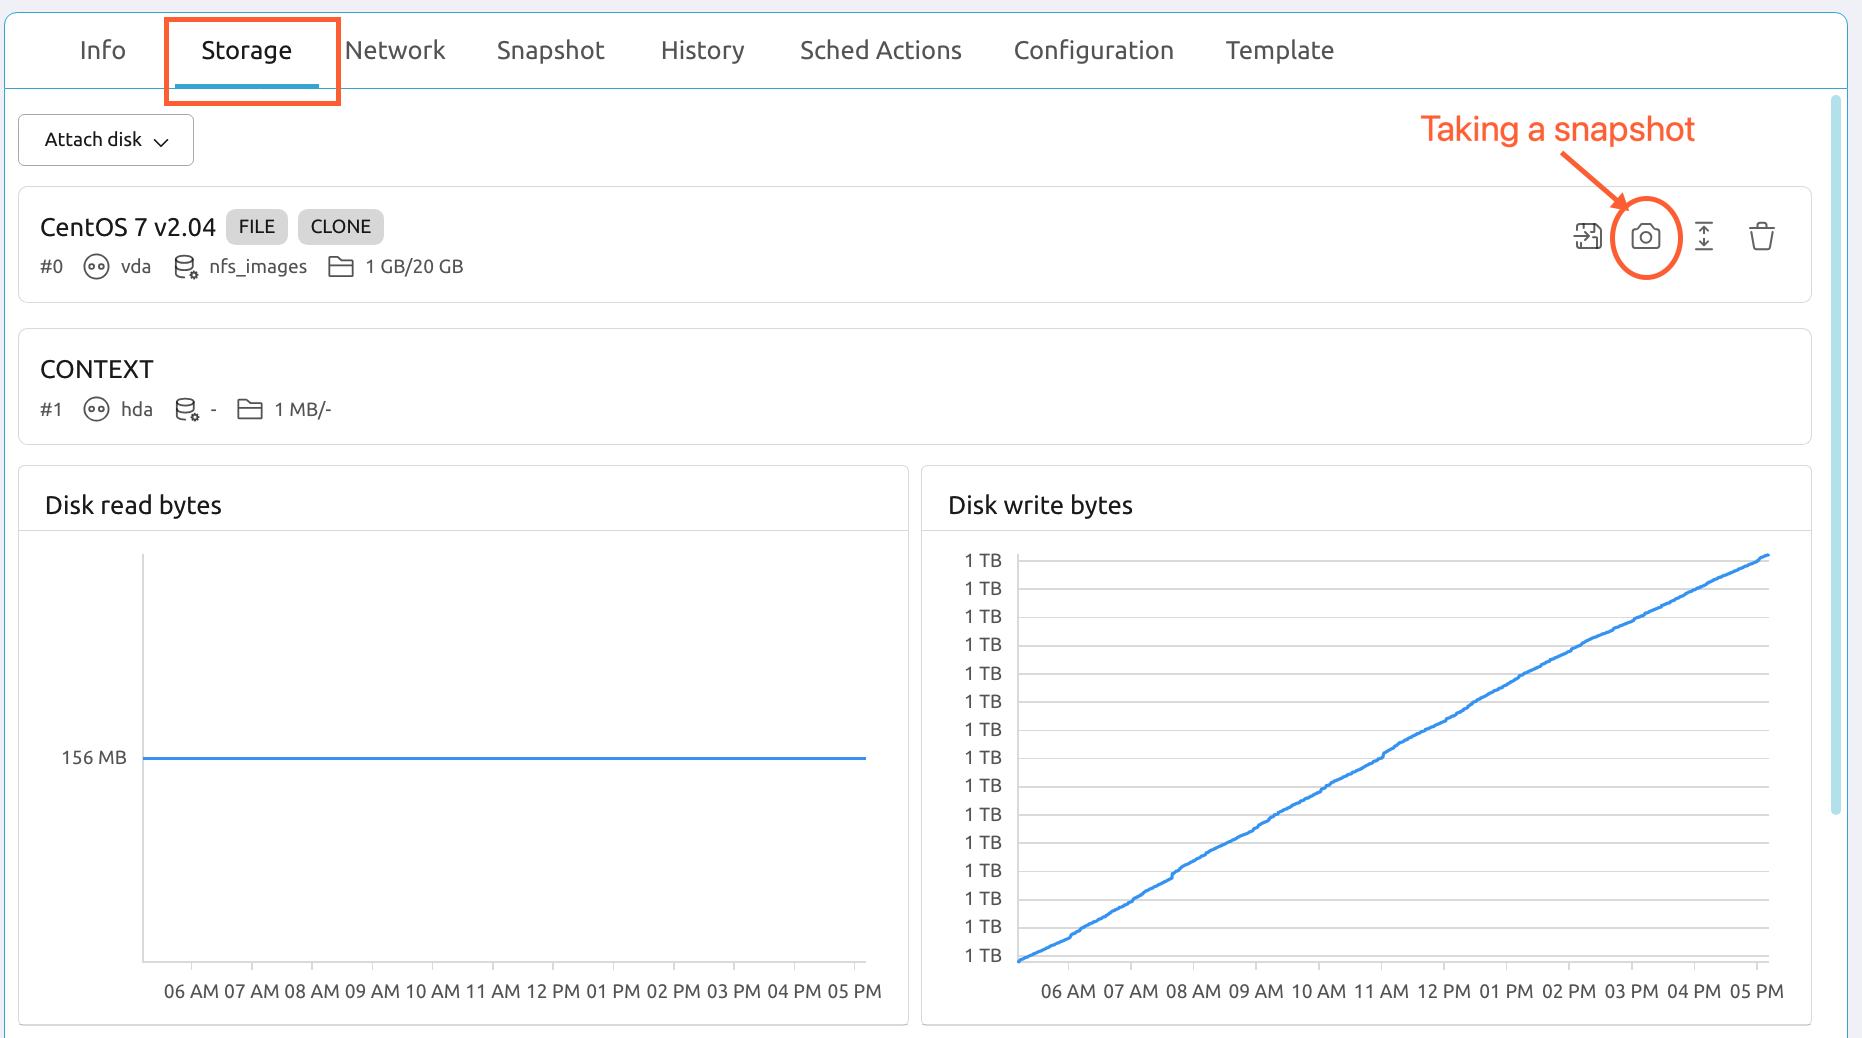
When creating a new snapshot, we highly recommend adding the date to the name. This allows you to keep multiple snapshots well organized.
Snapshots take a few minutes to process. Wait until the snapshot is complete before accessing the VM again. The snapshot appears in the Storage tab once it has completed processing.
Restoring a VM from a snapshot
Suspend or stop the VM before restoring from a snapshot.
Snapshots can be accessed from the VM's detail page in the Storage tab. Find the snapshot that you would like to restore from the list and select the revert icon.
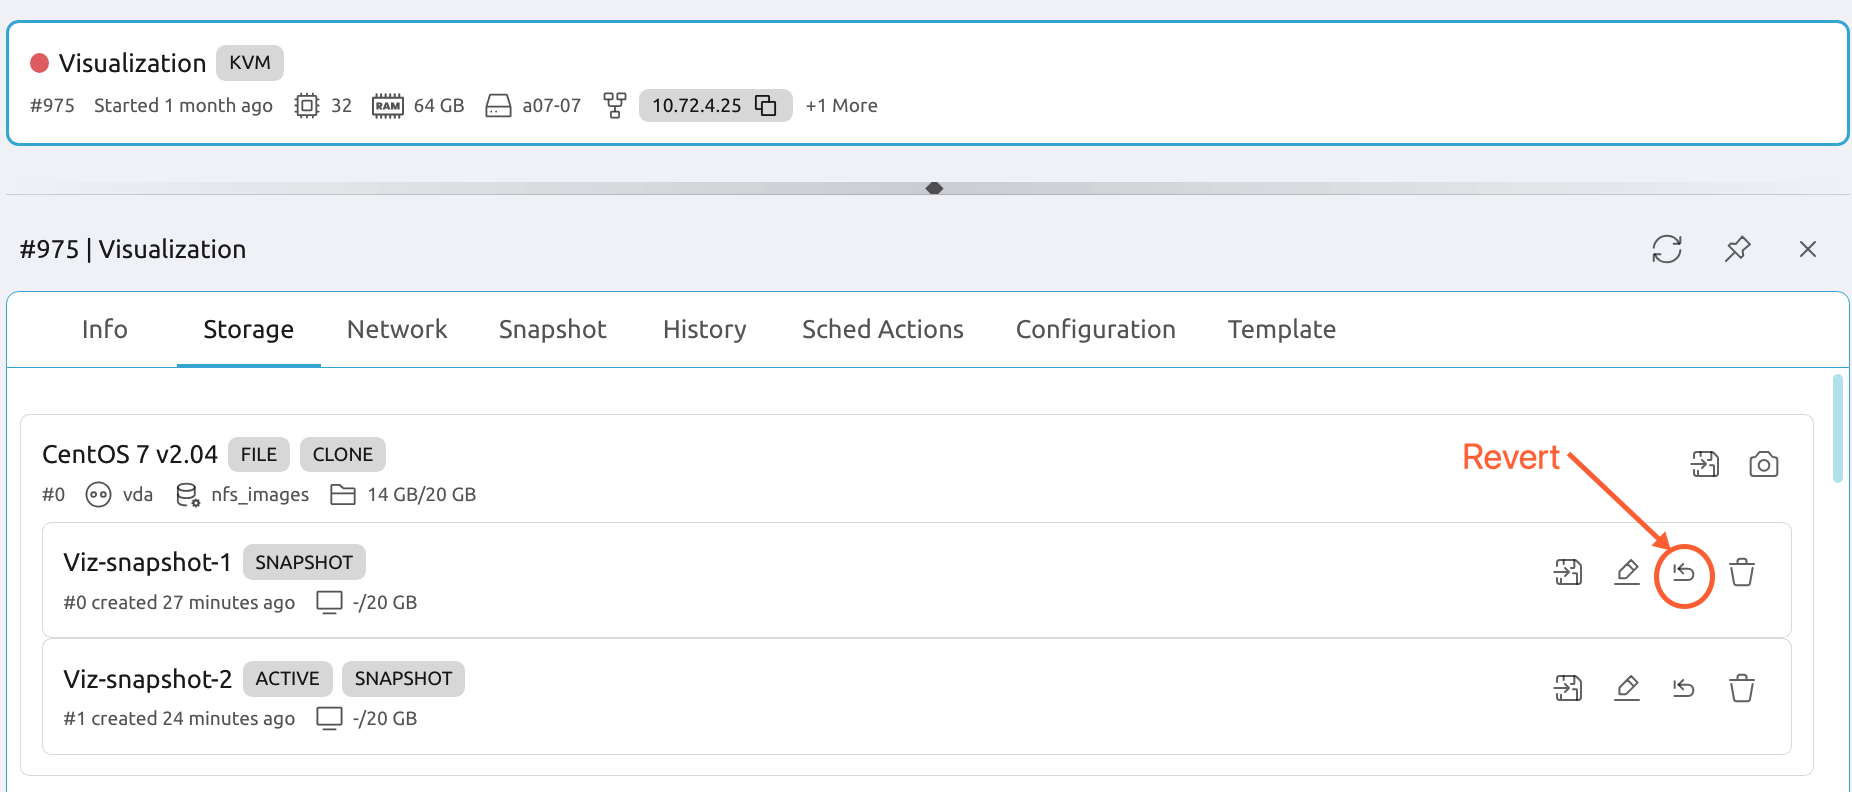
Confirm that you want to proceed. Restoring from a snapshot takes a few minutes. Wait until the restore is complete before accessing the VM again—use the refresh button to check the progress.
Terminating a VM
There's no need to terminate your VM if you won't be using it for a day or two, but we highly recommend powering off your VM at the end of each session. Power off a VM from the VM's detail page by accesing the actions dropdown menu at the top of the page and selecting Poweroff.
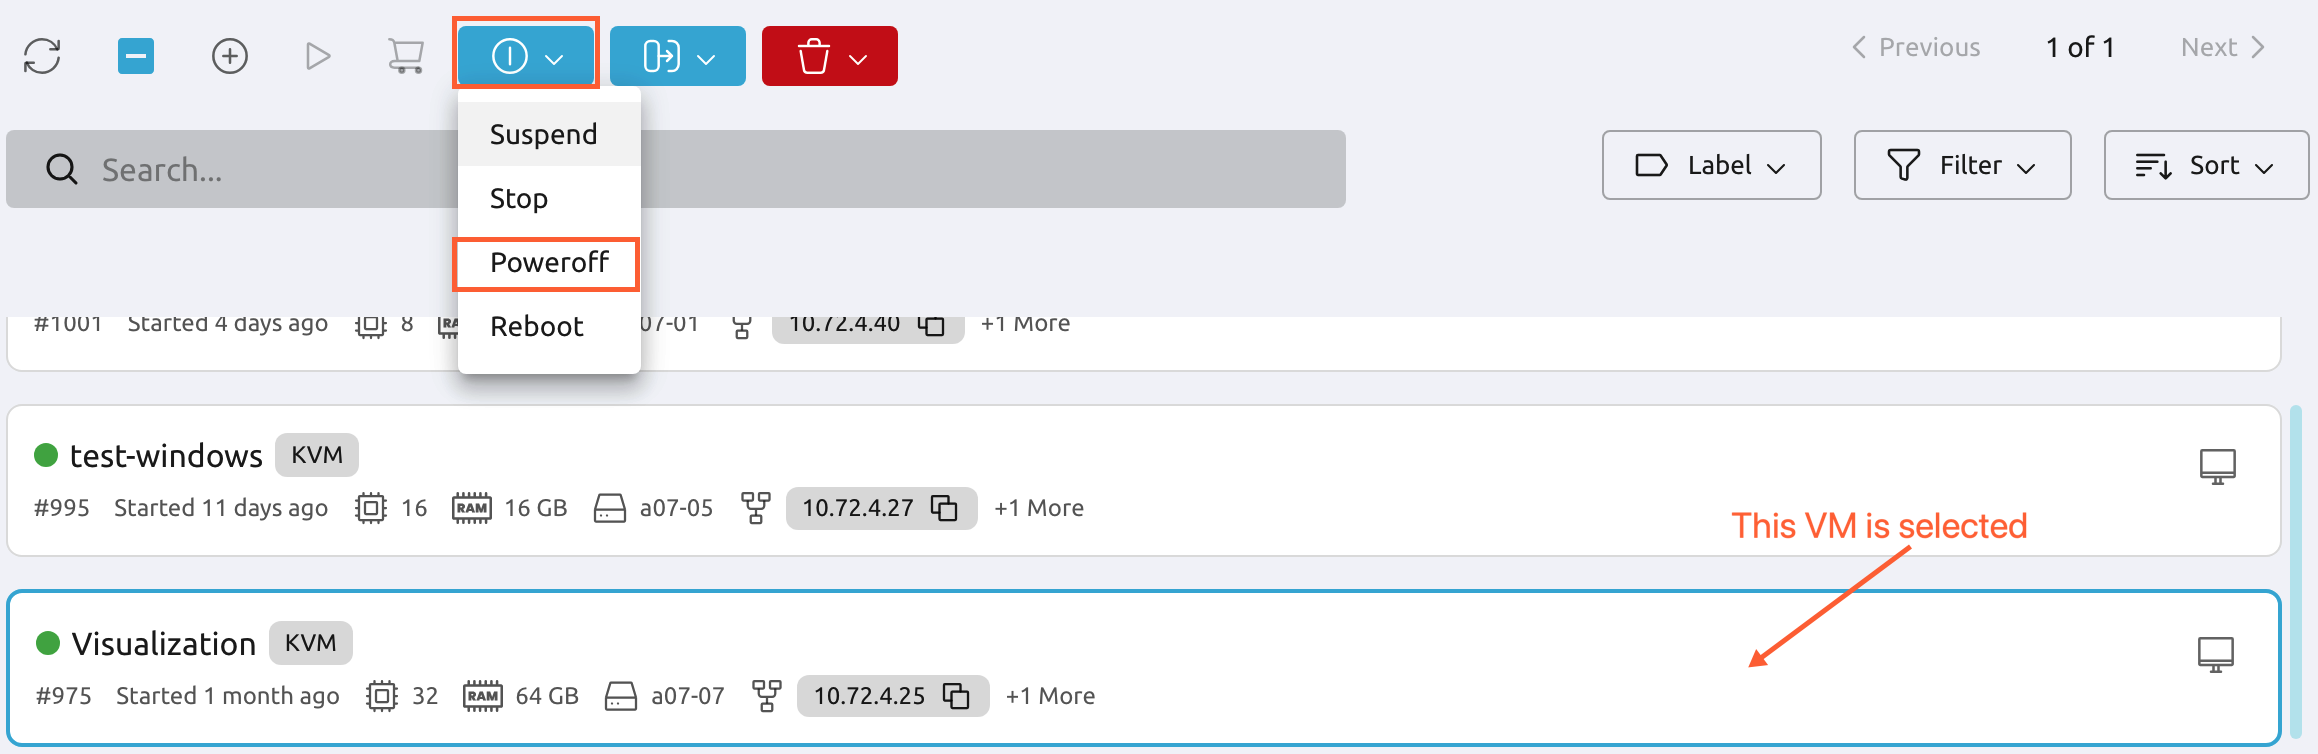
The VM will show a red circle to the left of its name to indicate it's powered off.
When the VM will not be used for an extended period of time (e.g., a couple of weeks, over a semester break), it should be terminated.
Back up your active datasets and code to your local computer, Git repository, or CARC /project storage before terminating your VM. When you return, create a new VM, upload your work, and continue. The new VM will be up to date with enhancements and running on the optimal hardware selected automatically by the private cloud platform.
Terminate a VM from the VM's detail page by selecting the red trash can button.
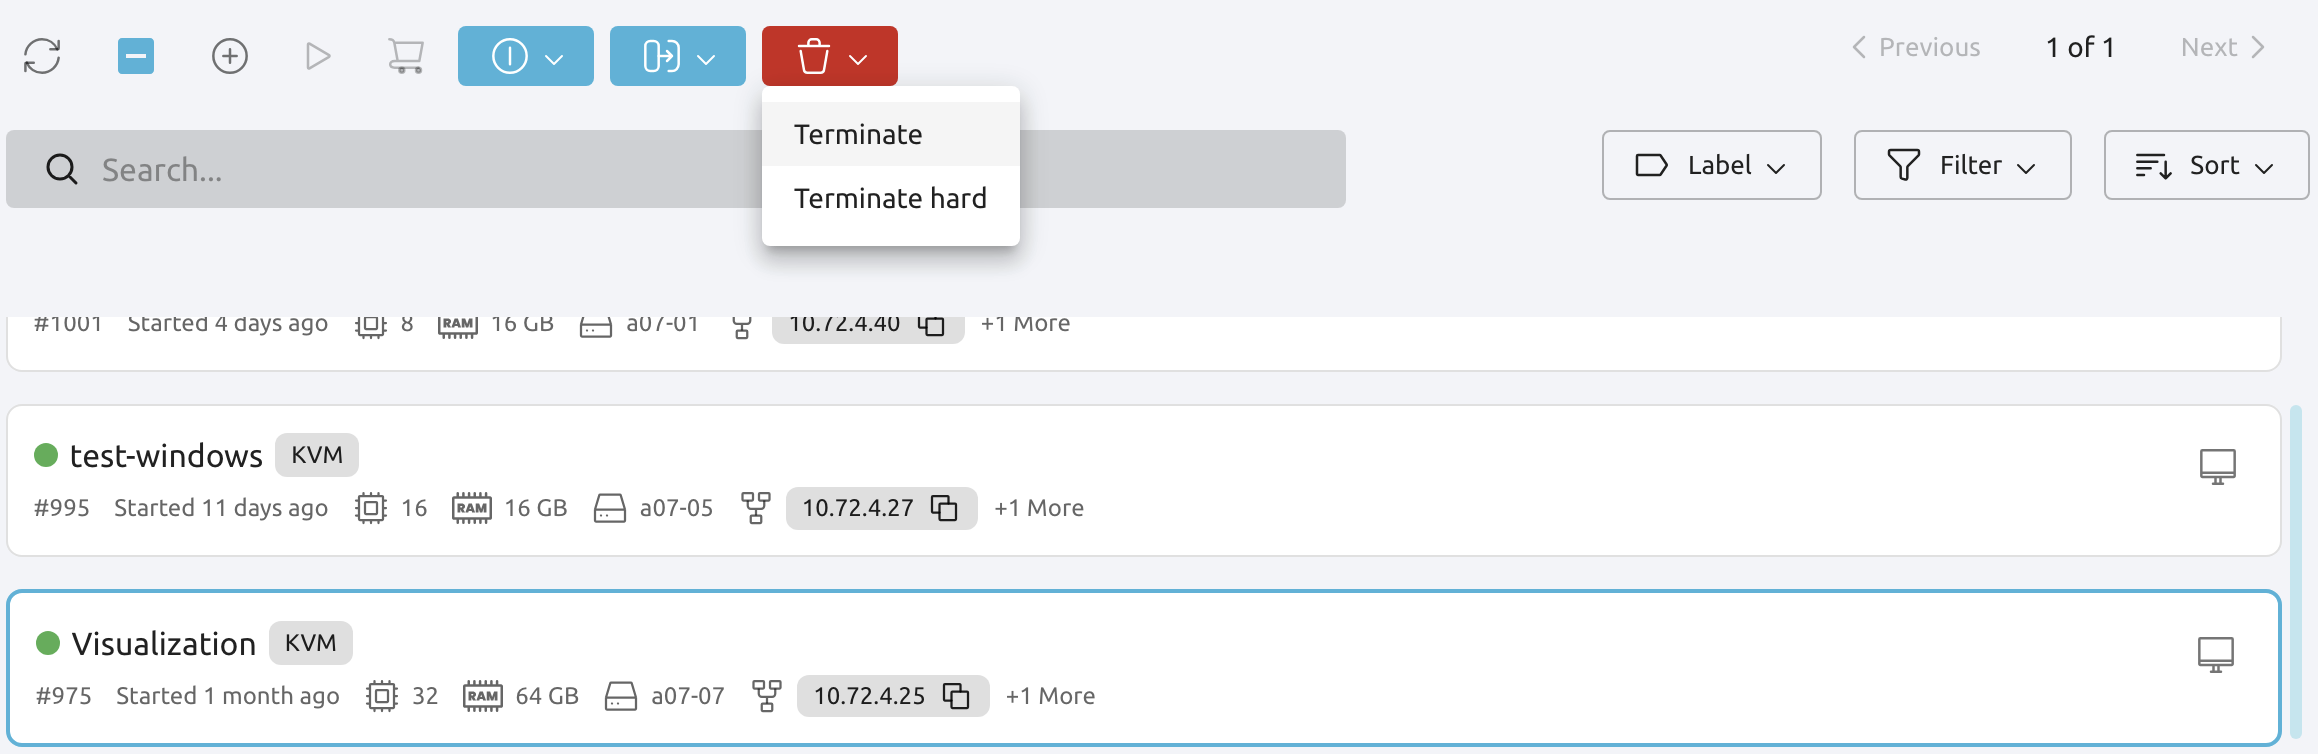
We recommend using Terminate instead of forcibly terminating the VM with Terminate hard.
After terminating an instance, the VM will no longer appear in the VM list on the dashboard.
Scheduling tasks
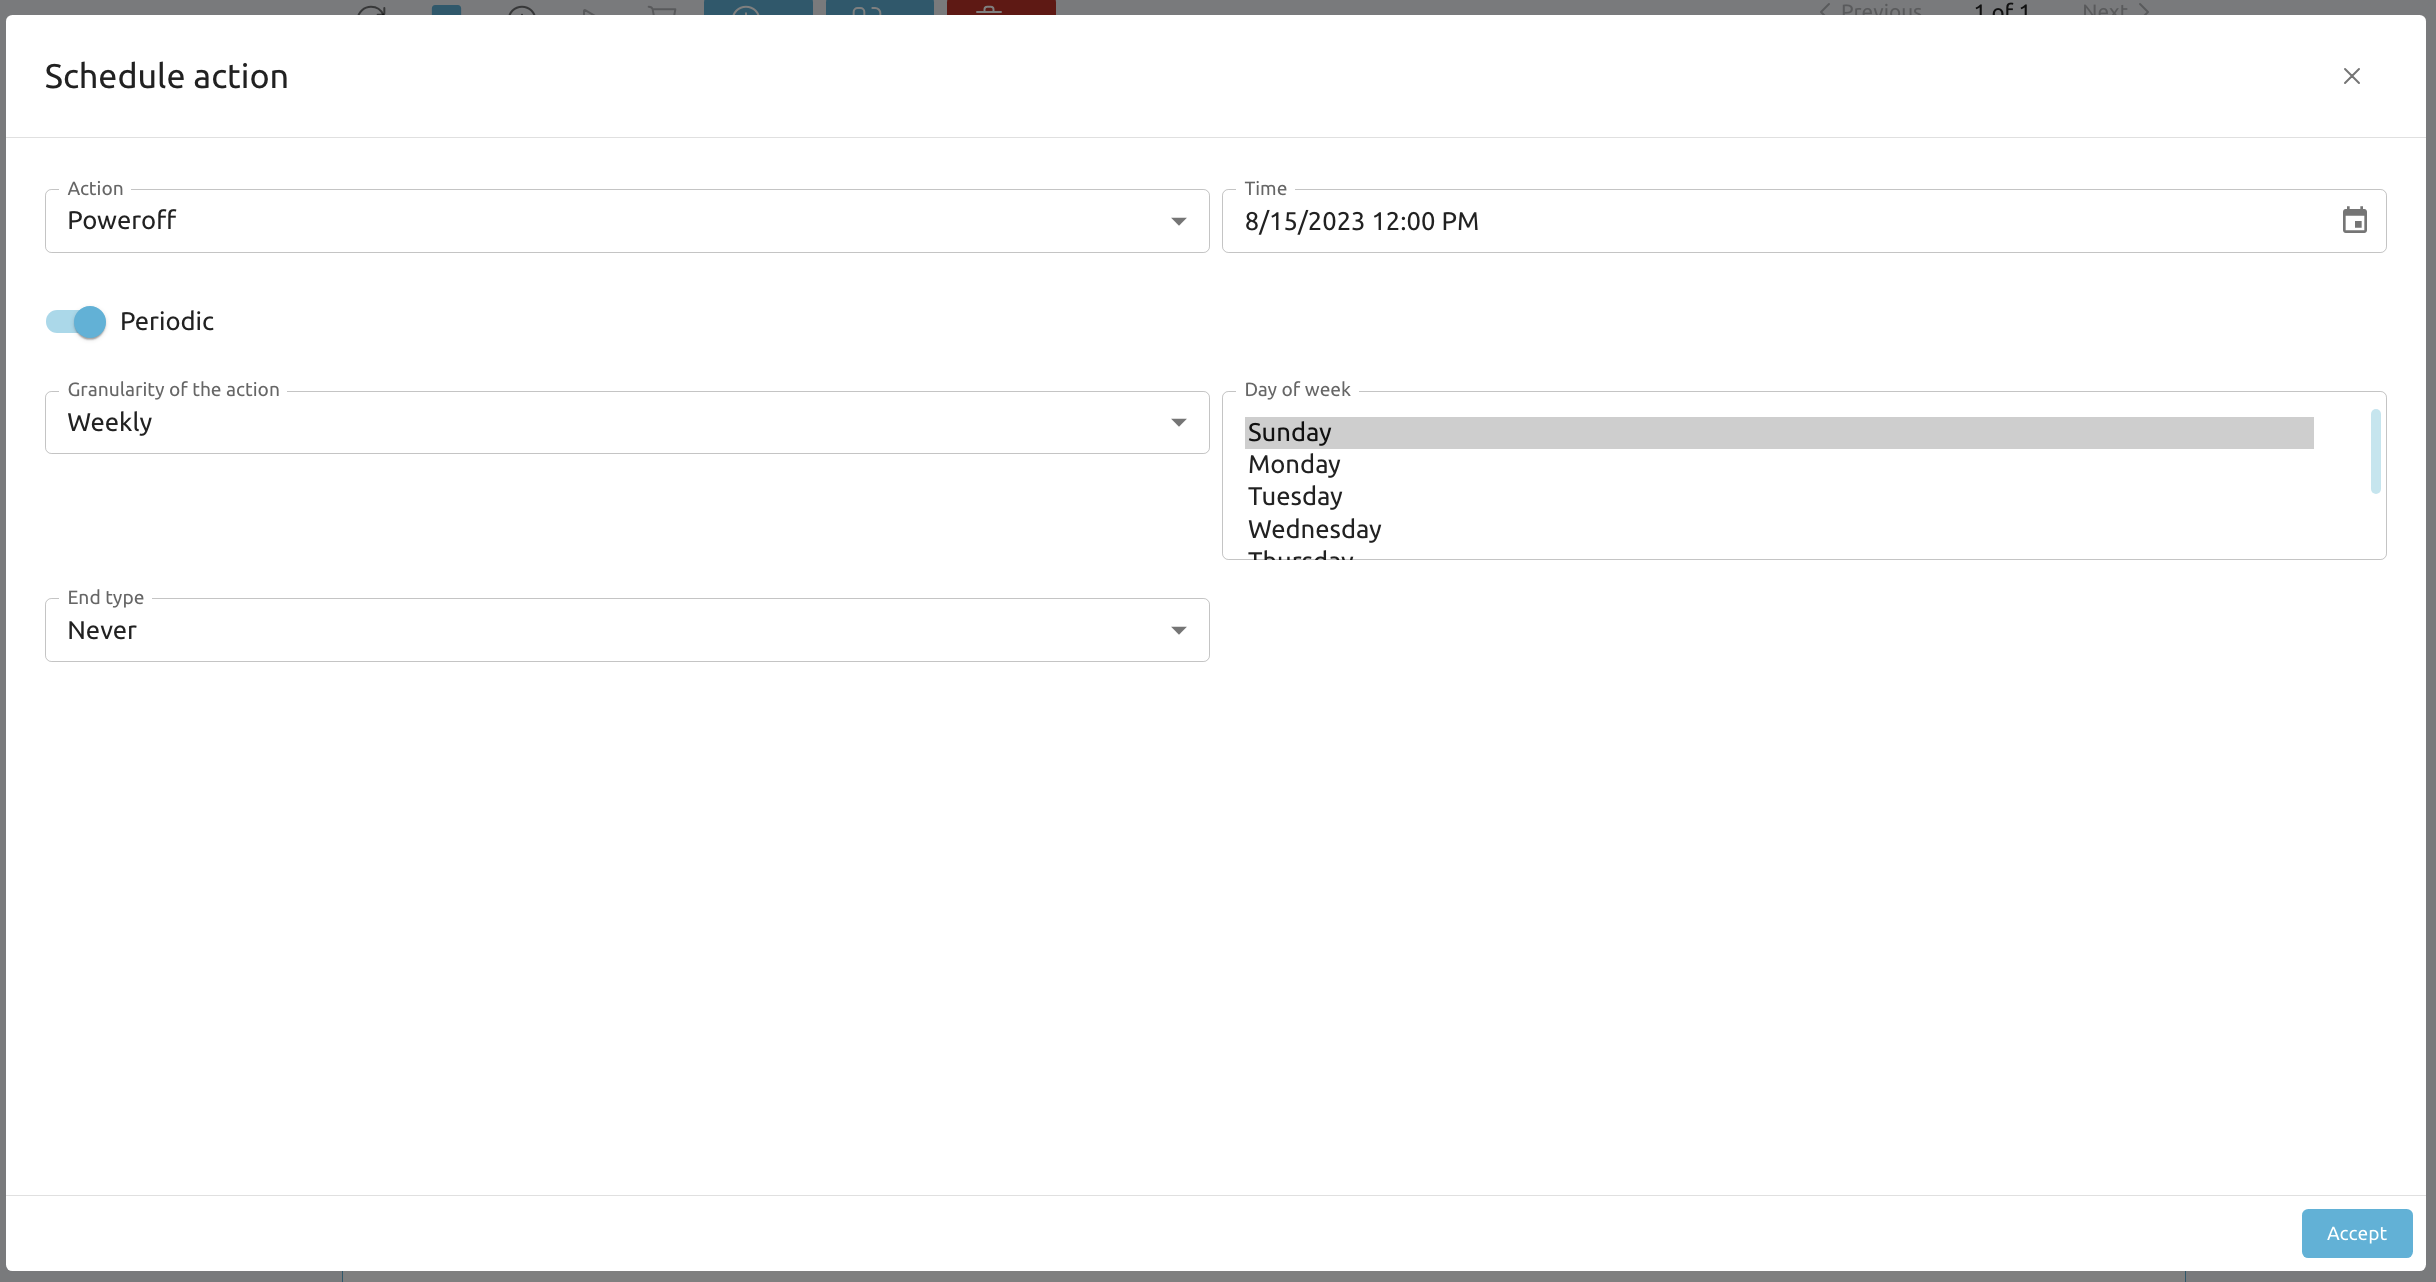
Tasks, such as termination, suspension, and taking snapshots, can be scheduled from the Sched Actions tab in the VM details. This is especially useful for minimizing the risk of accidentally accruing charges on a VM that you are no longer actively using.
Schedule an action by selecting Add action.
Specify the details of the action in the pop-up window and select Accept when finished.